DIY Electric Scooter Project

I designed and built an electric scooter from scratch
Specifications
- ⚡Power: Dual drive system, 1500W each motor
- 🔋Battery: Custom-built battery pack, 48 V - 32 Ah
- 🏎️Speed: 60 km/h top speed
- 🛣️Range: 70 km range
- 🔩Suspension: 4x Spring suspension system
- 🛠️Construction: Steel body, built like a tank
I was taking a gap year and decided I wanted to build something cool. I wanted to make a powerful, long-range electric scooter that was both practical and fun to ride. Rather than buying a commercial model, which would have been cheaper, I build one from scratch.
It took me around 6 months to design and build, mostly because it is very difficult to find resources and parts. That is the reason I am making this page. I want to help the people that also have this crazy idea.
I'll take you through the entire building process - from finding the right components, to design, to manufacturing. And the challenges I faced along the way.
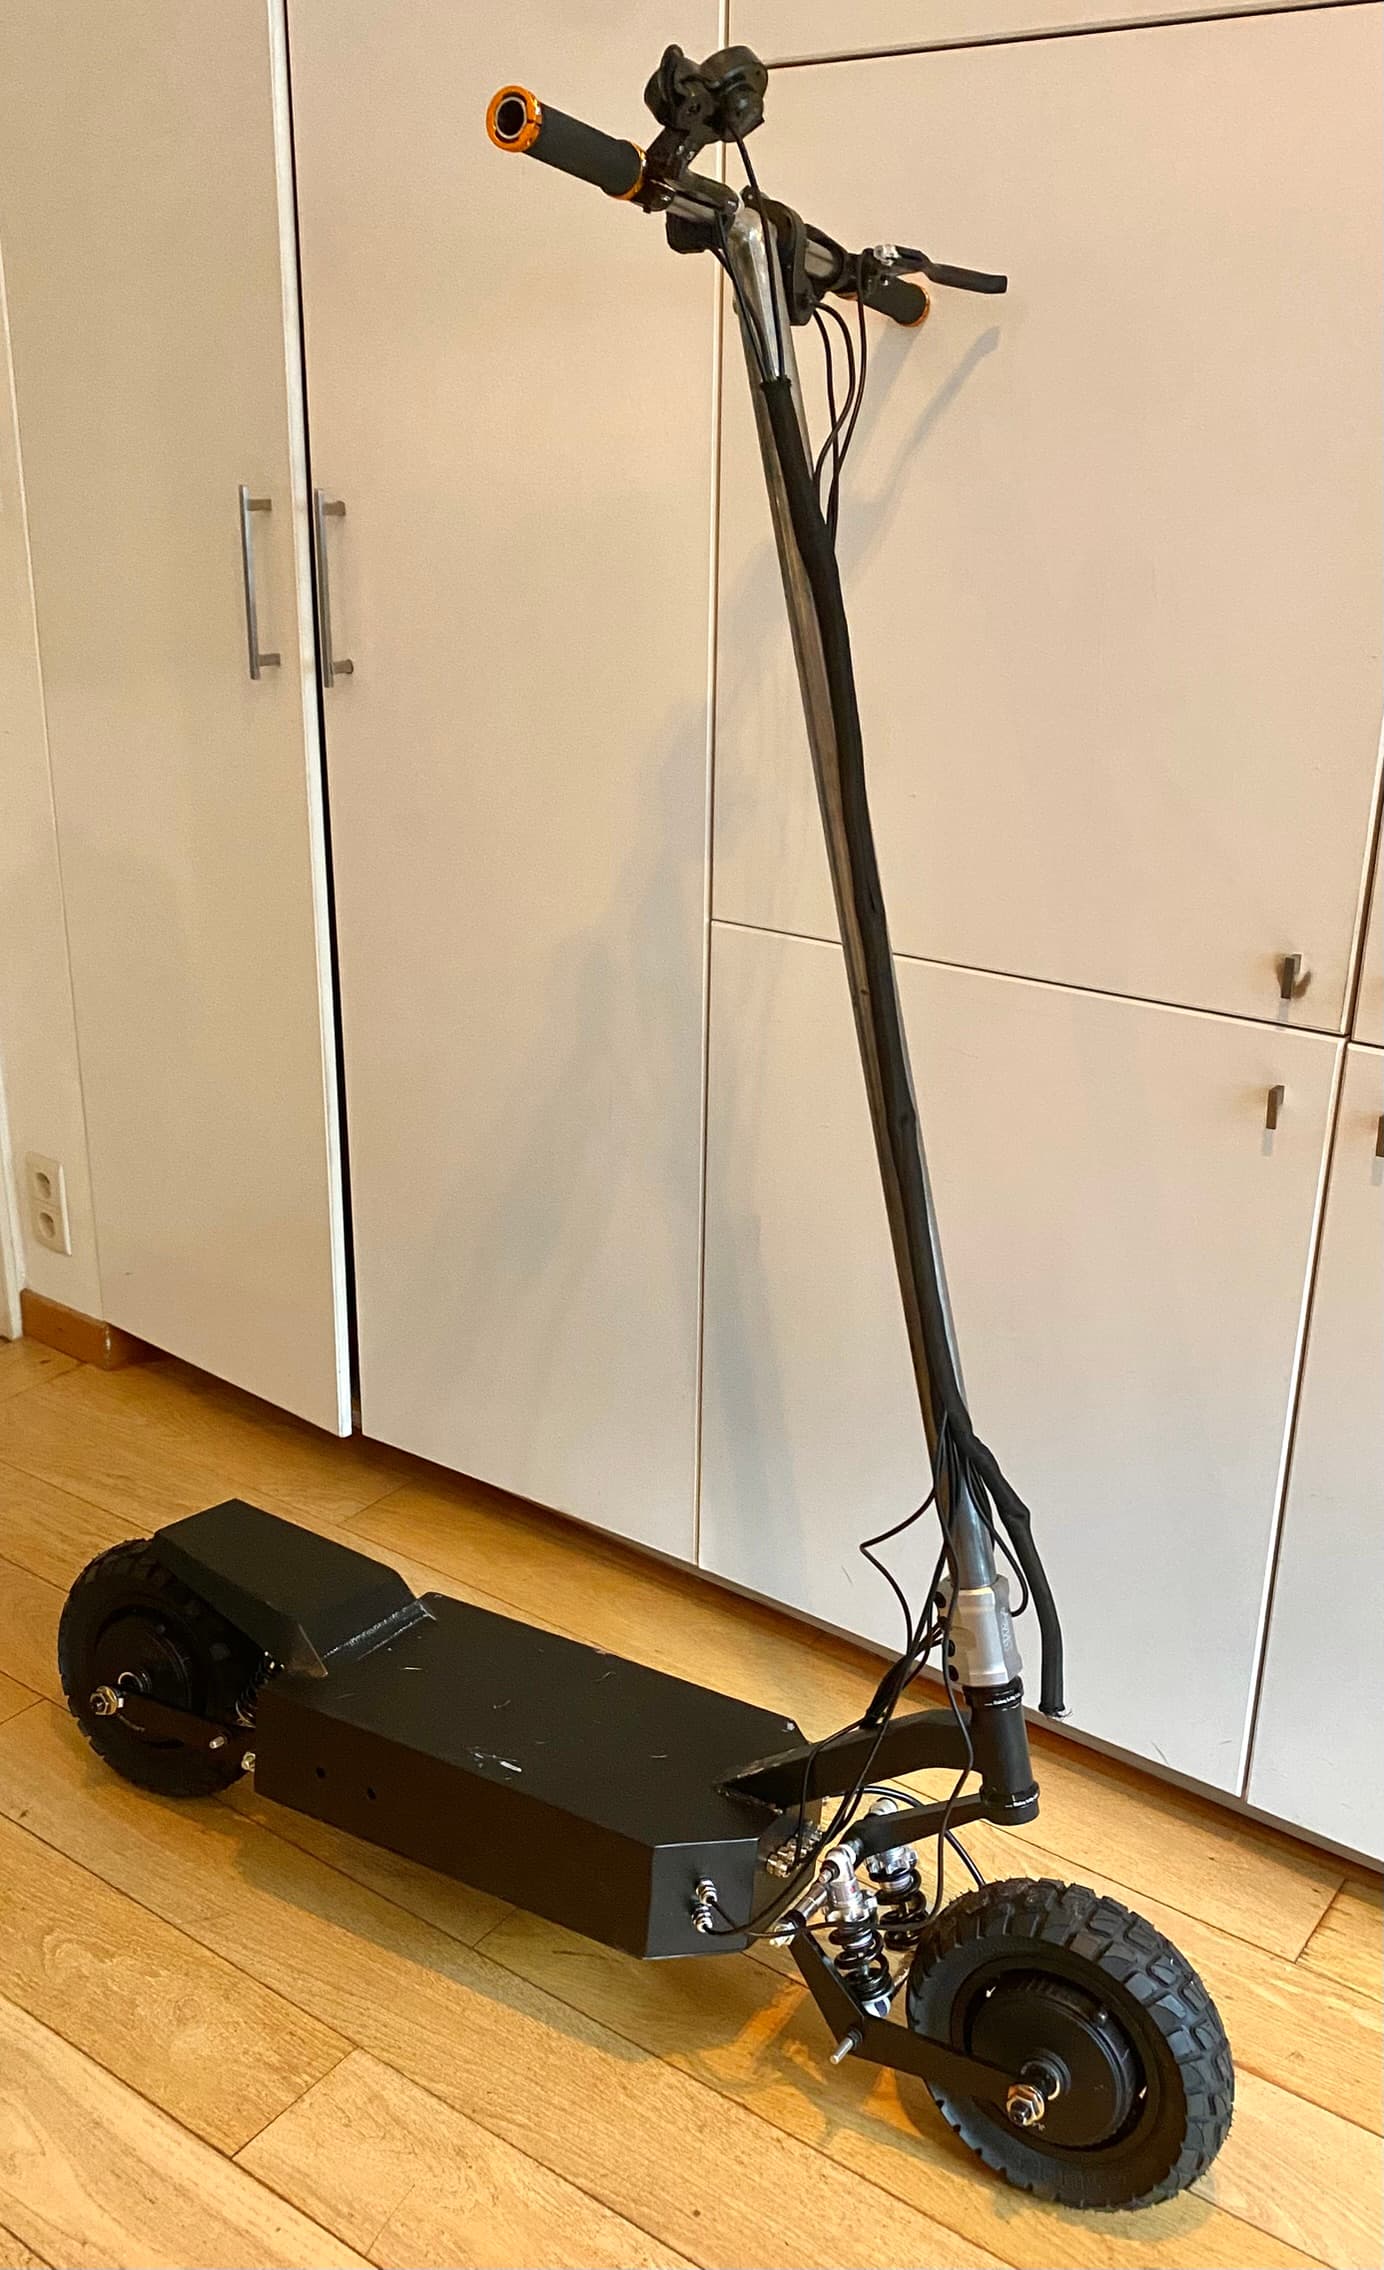
Electric scooter front view
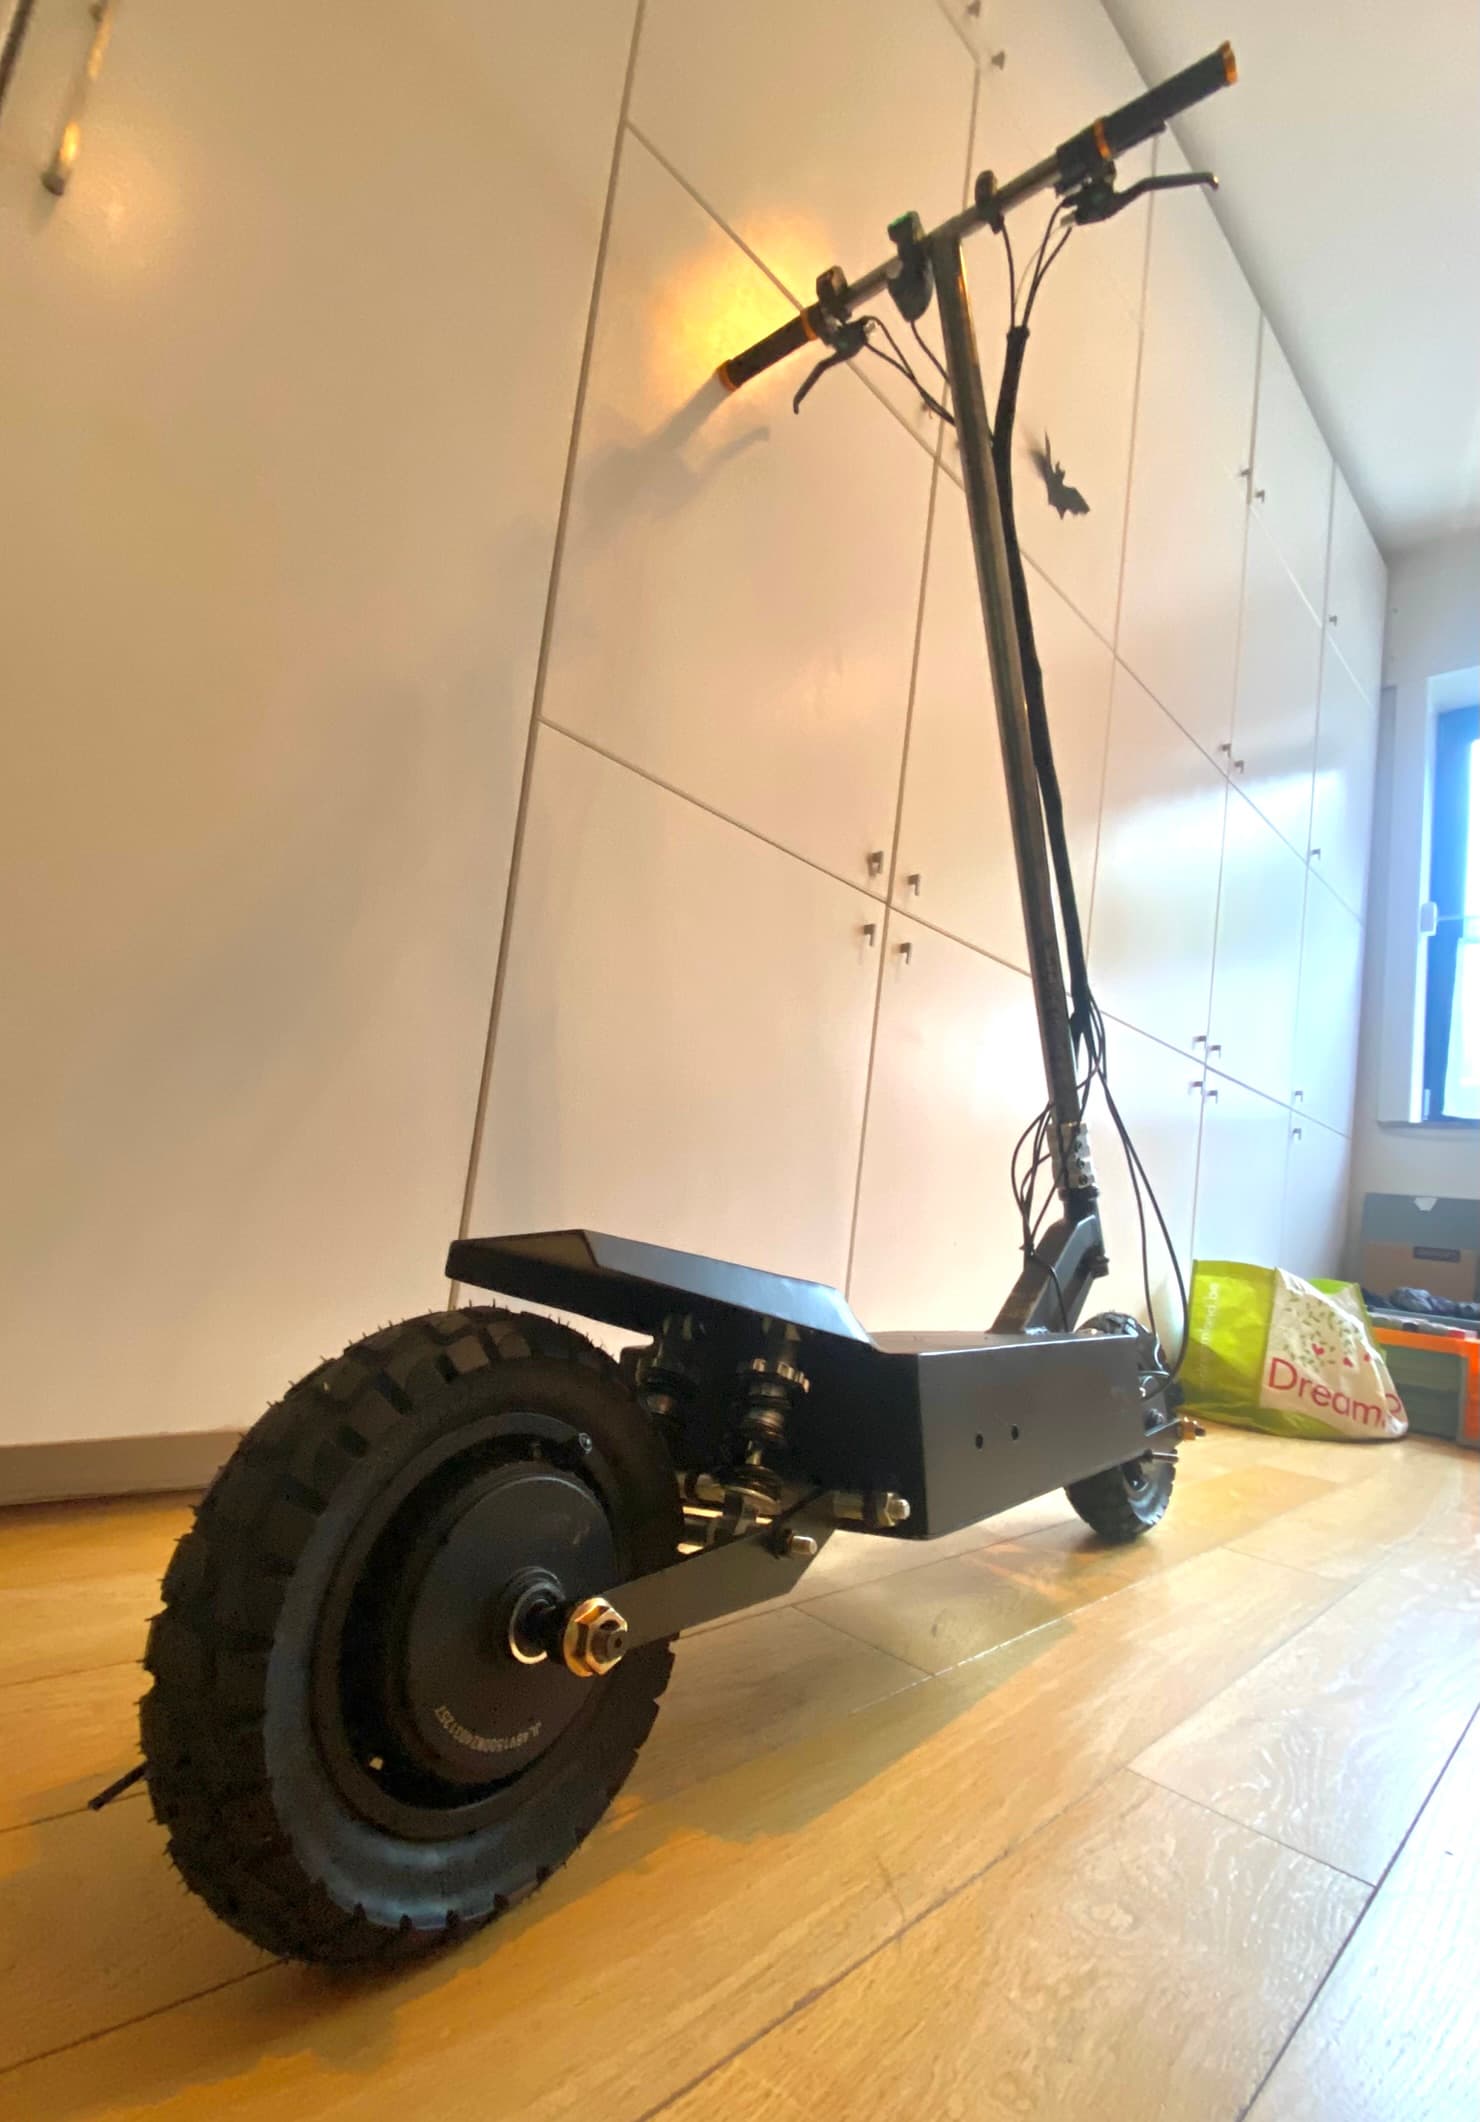
Electric scooter back view
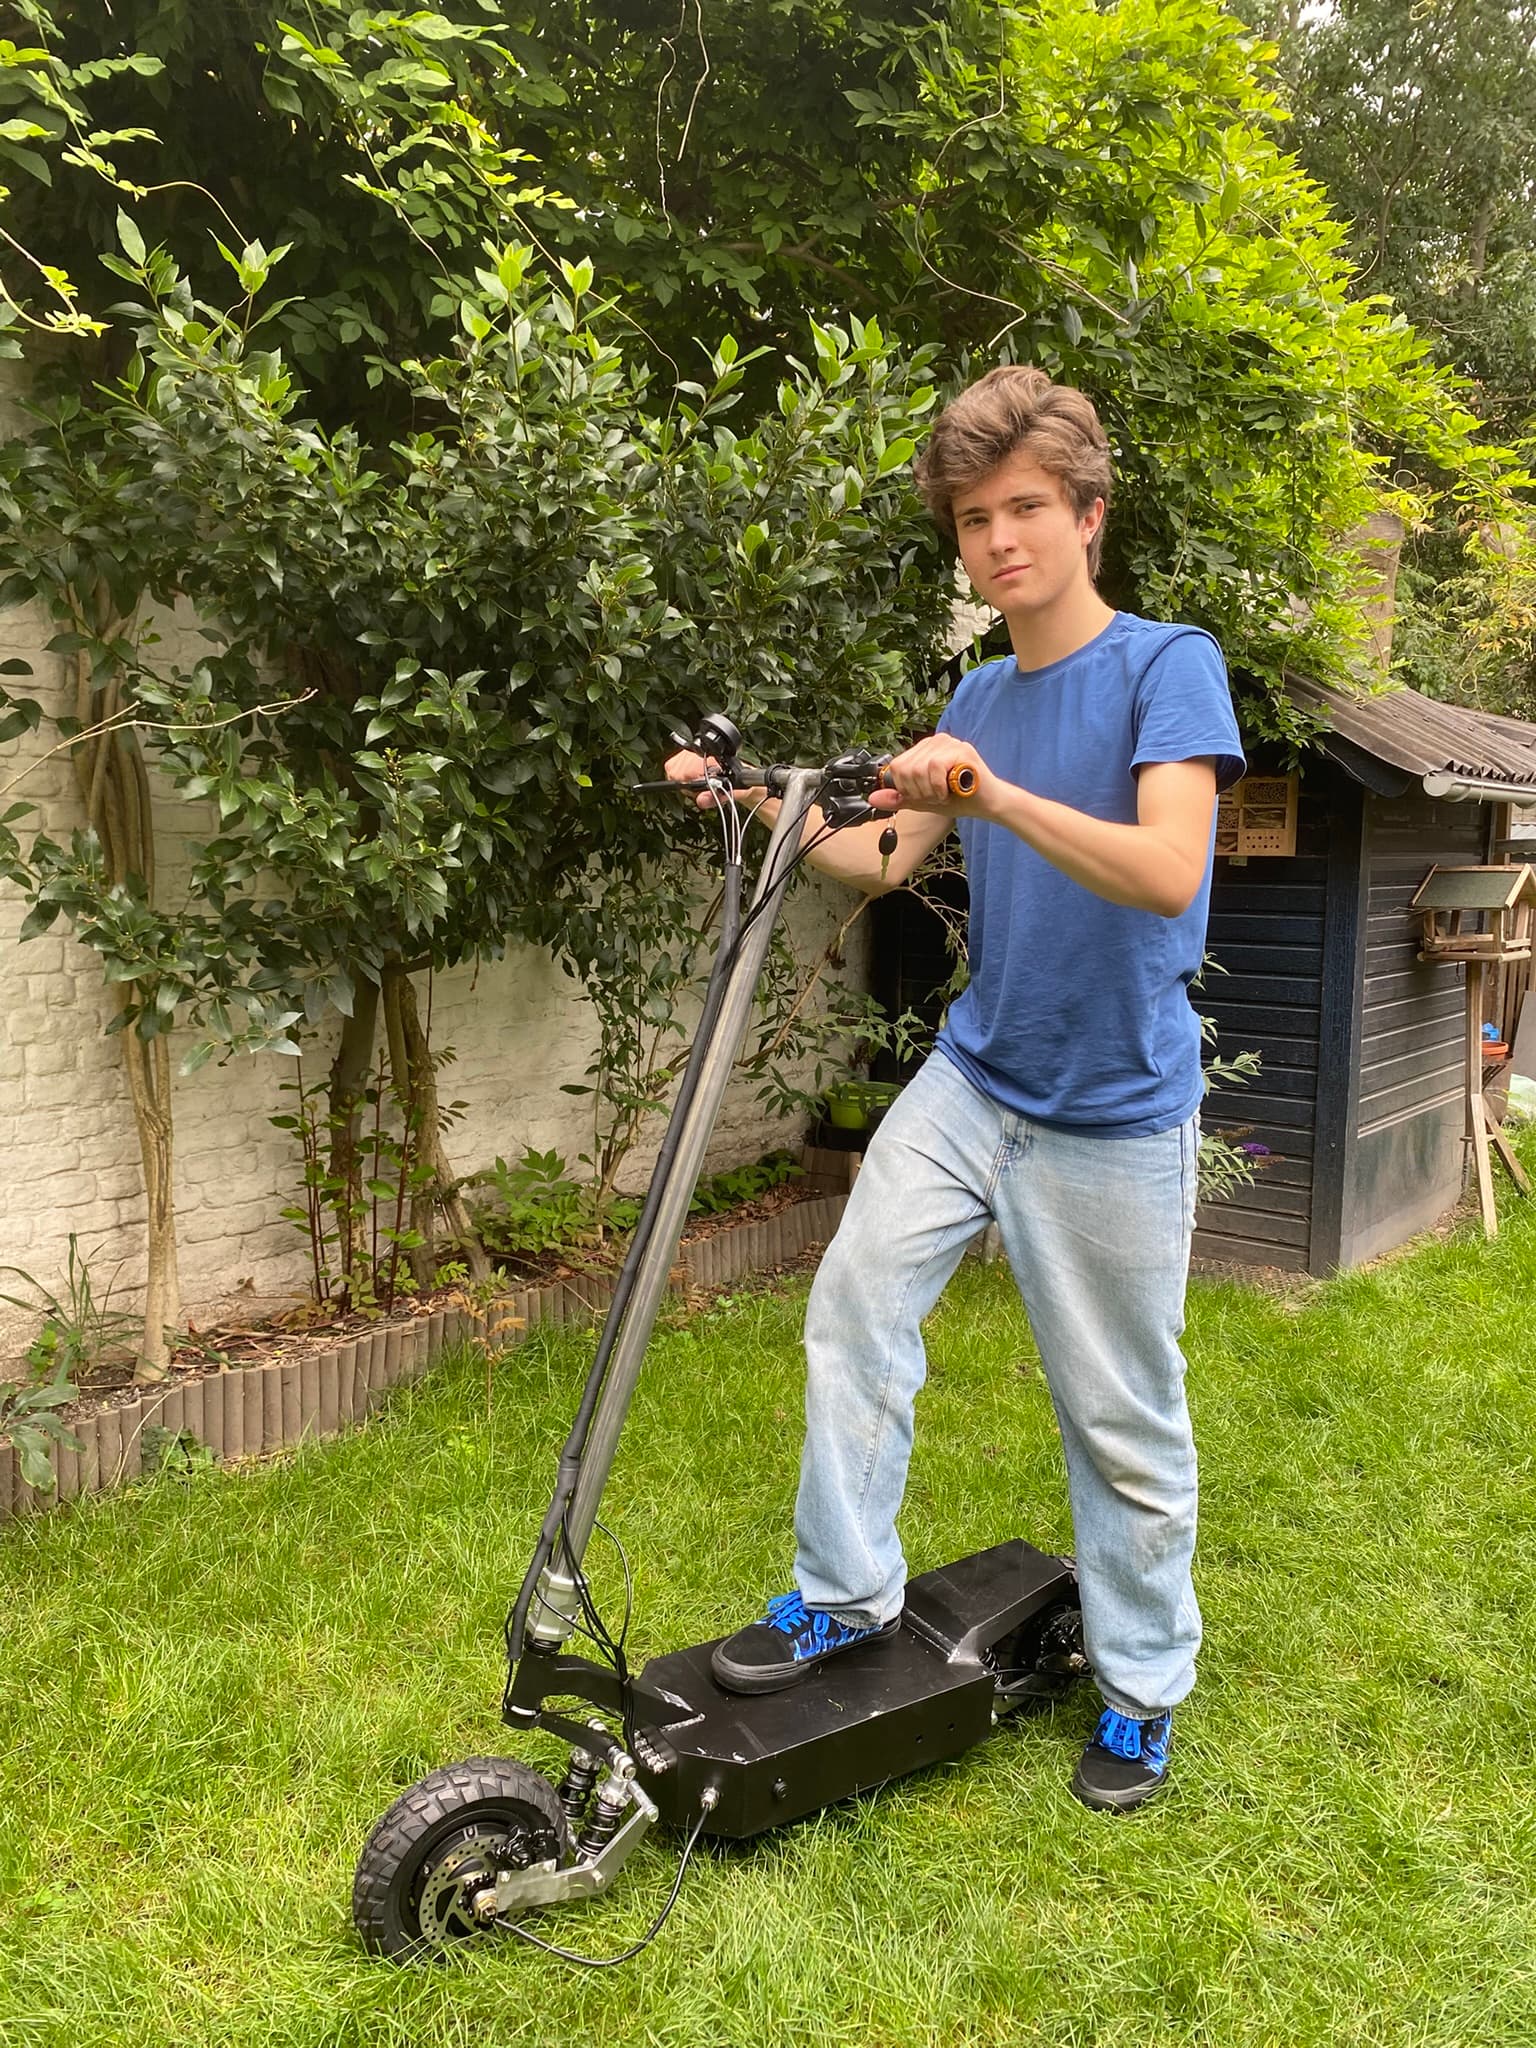
Electric scooter in the backyard
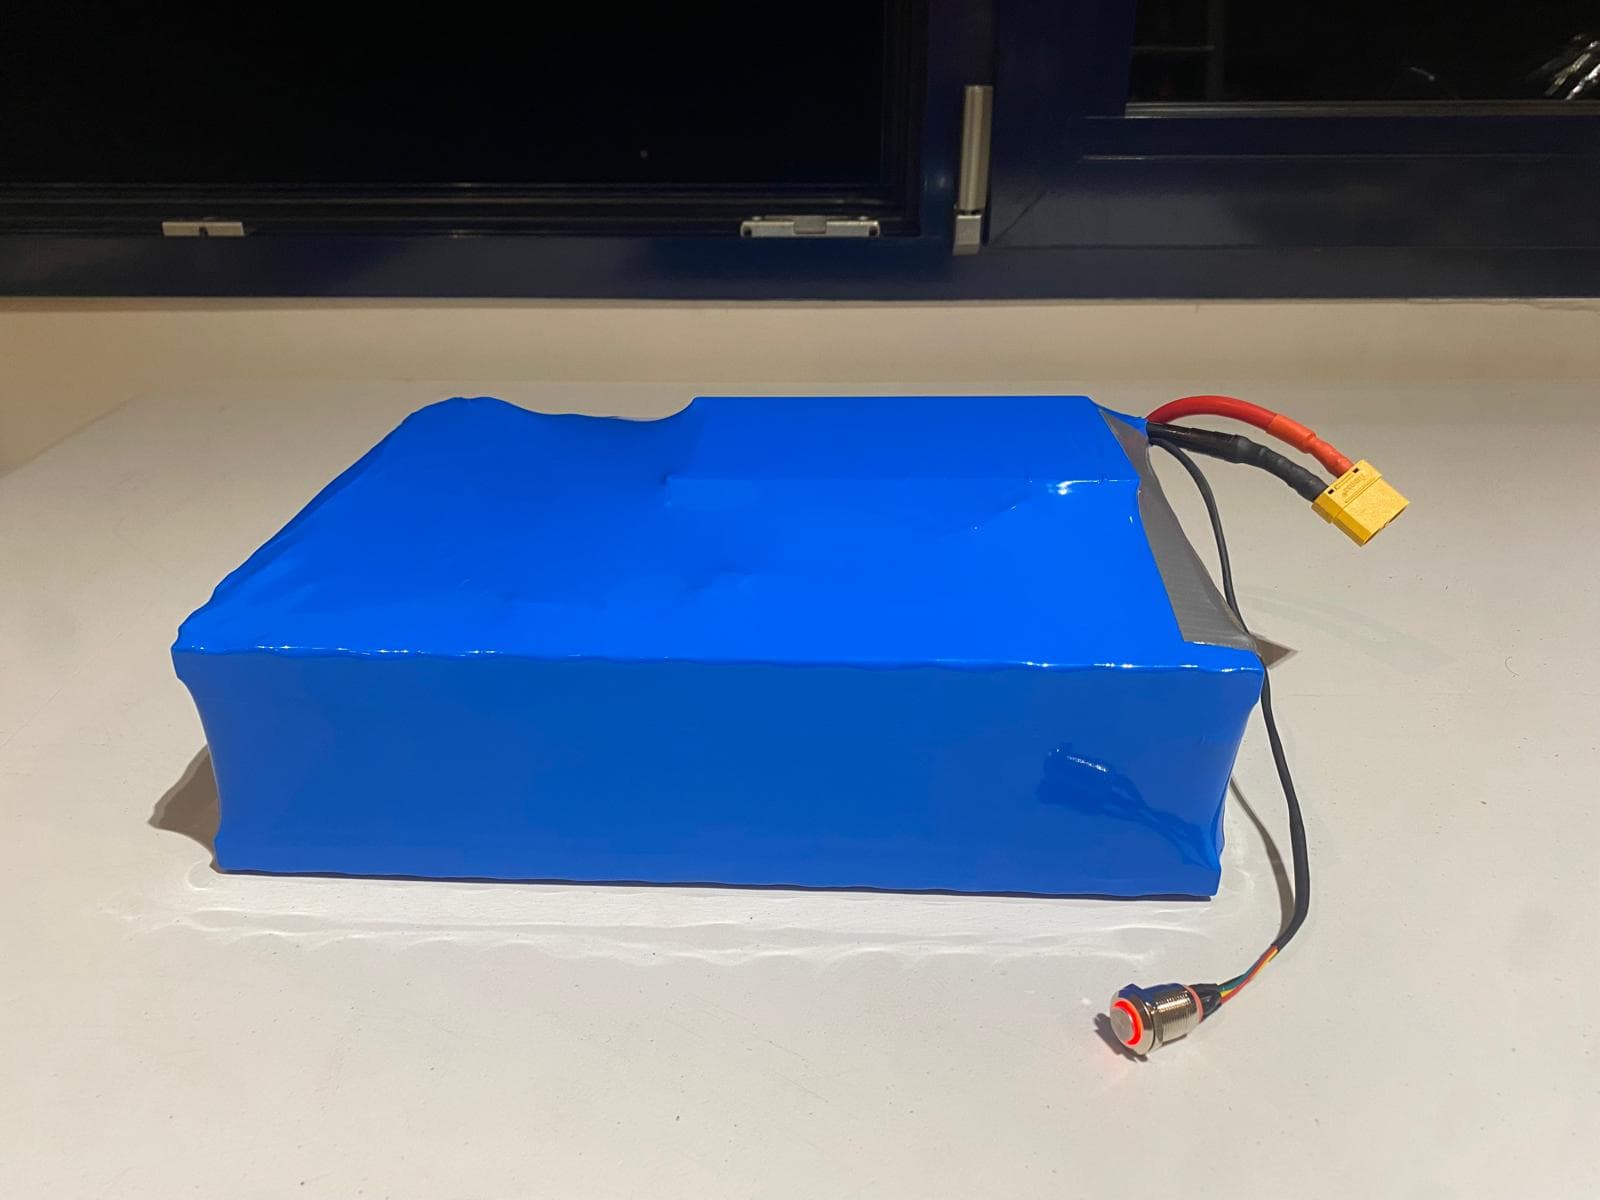
Battery Pack
The heart of the scooter is a custom-built 48V 32Ah lithium-ion battery pack. I designed it using 117 18650 cells arranged in a 13S9P configuration.
- 117x battery cells (EVE INR18650-35V - 3500mAh - 3.7v)
- 13 in series (13 x 3.7v = 48.1 volt)
- 9 in parallel (9 x 3500mAh = 31.5 Ah)
- Kweld spot welder
- 0.2mm pure nickel strips
- JKBMS battery management system
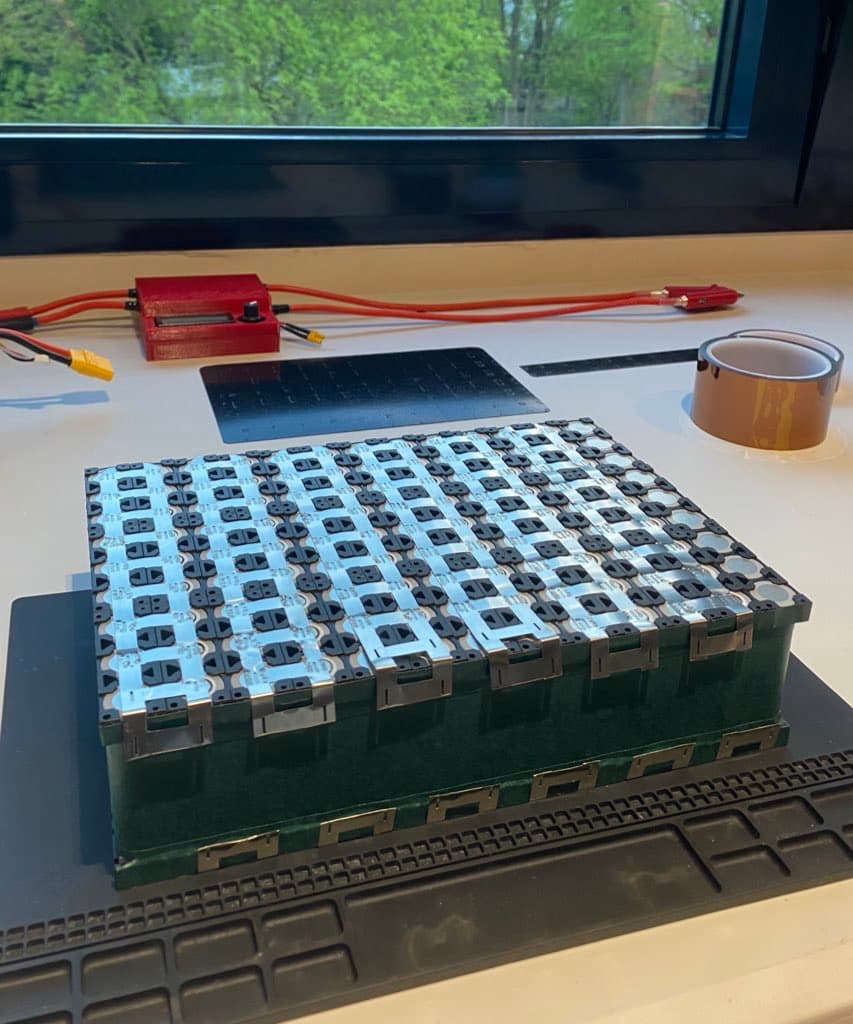
Battery cells after spot welding
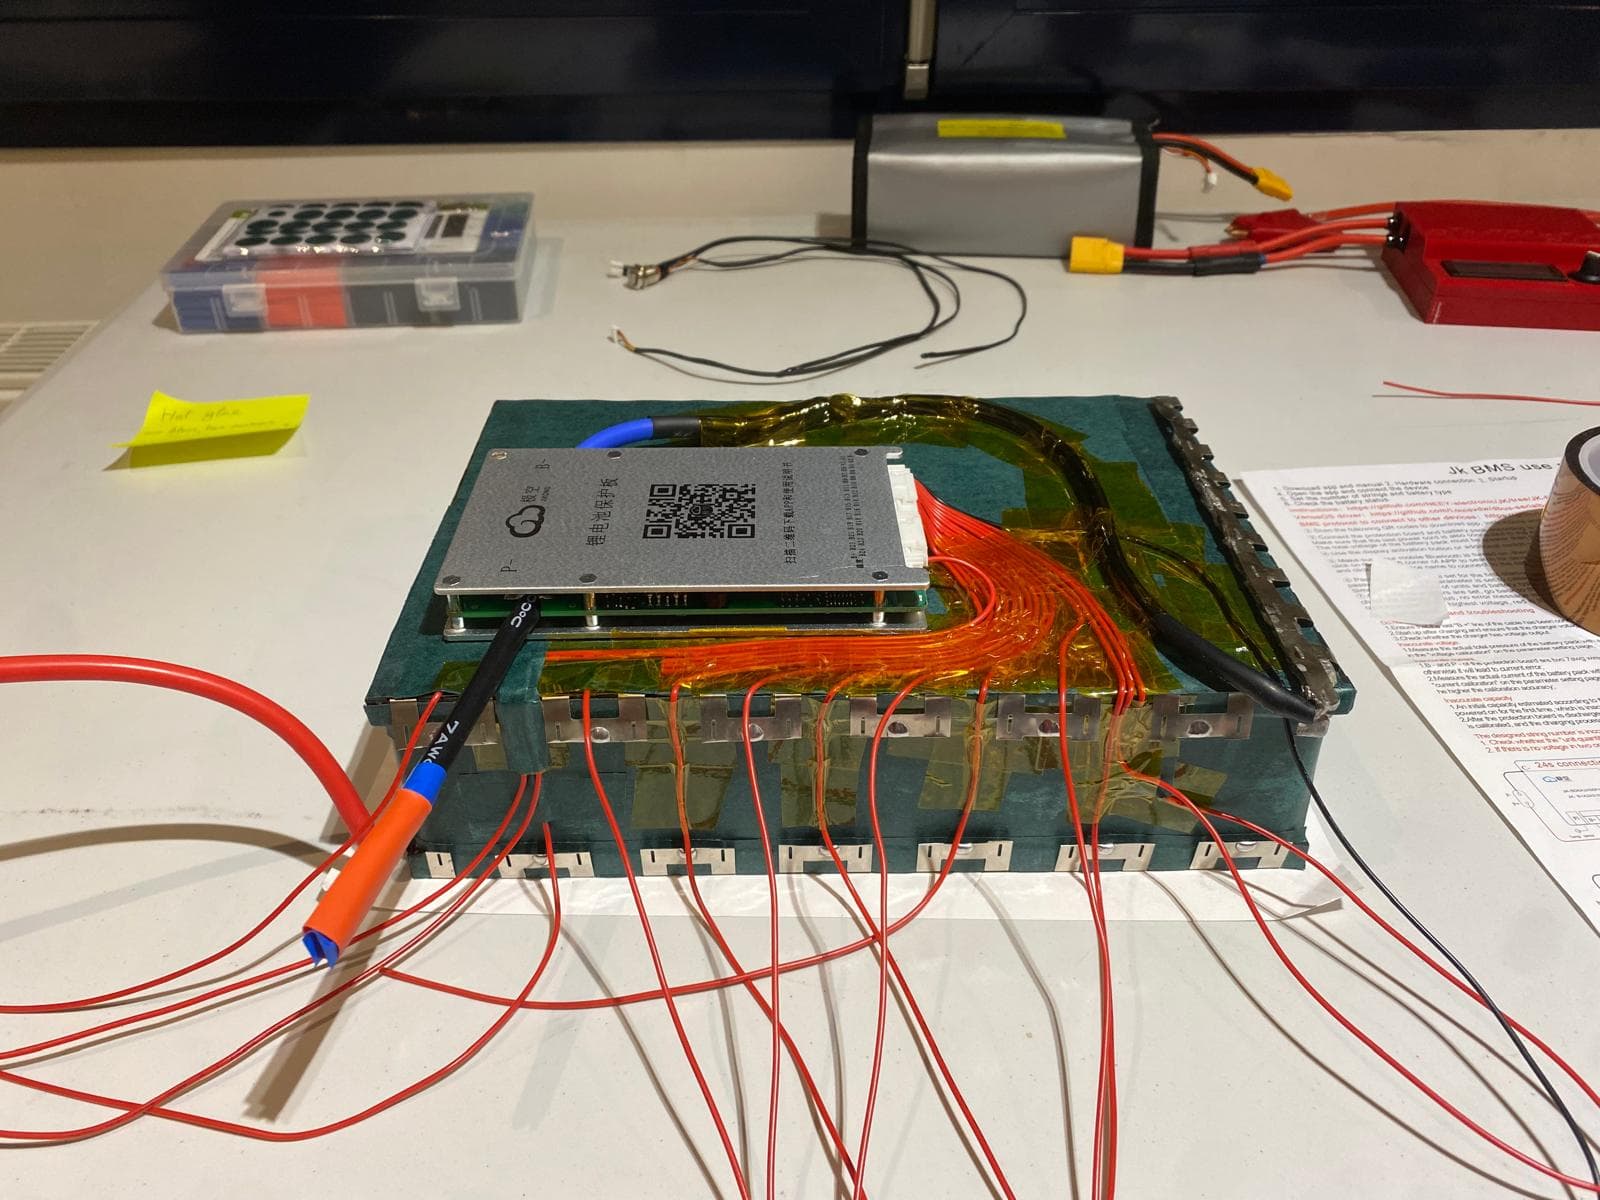
Battery pack wiring connections
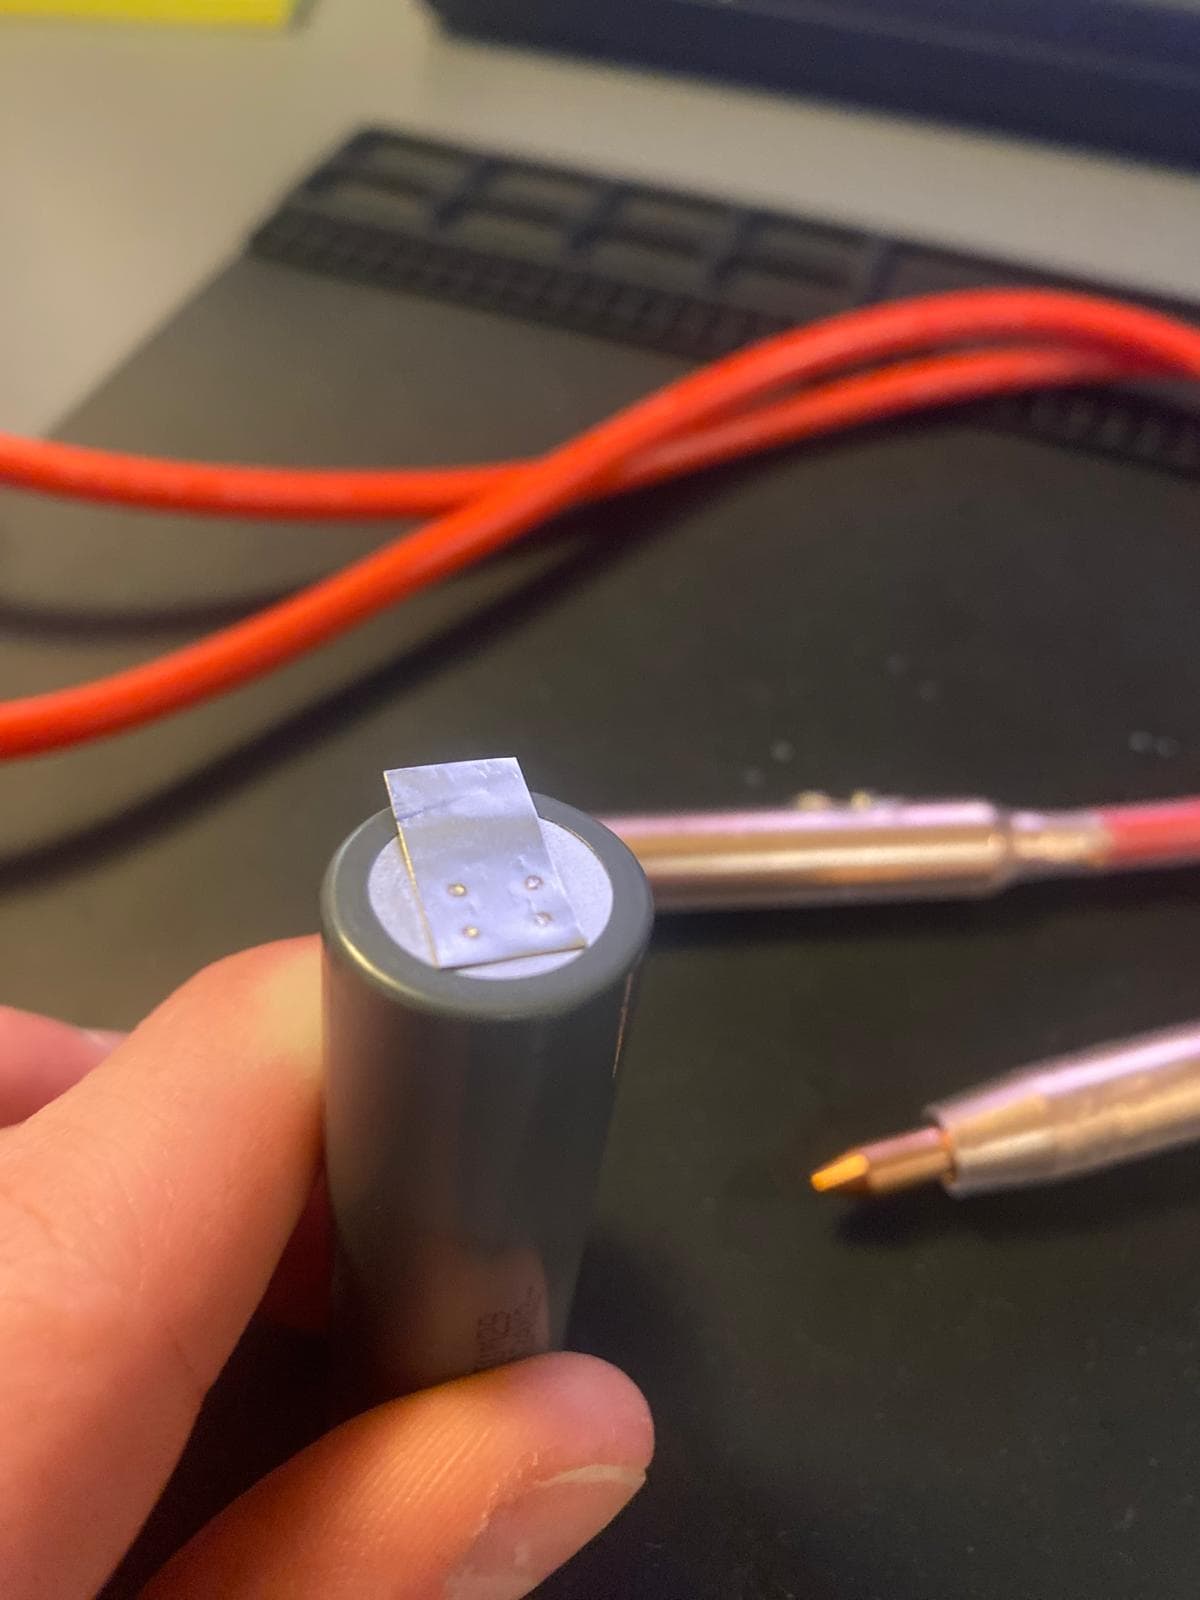
Spot welded cell
Figuring out how to make a battery pack was actually pretty easy. There are a lot of online resources, videos and blog articles. I decided to go with a 48 volt system since this is very common and easy it makes it easier to find other electronic components. It is however very important to make sure you research a lot because making mistakes here can be very dangerous. Designing or building your battery pack wrong can result in a fire or explosion, so please be very careful. Go watch some videos of battery fires on youtube to see what can happen if you don't do it right...
Important Warning: When buying battery cells, only purchase from reputable sellers and stick to well-known brands like Samsung, LG, Panasonic, Sony, or Molicel. Never buy cells from unknown sellers on Chinese websites that advertise unrealistic specifications like "10000mAh 18650 cells" - these are always fake and potentially dangerous. The maximum realistic capacity for 18650 cells is around 3500mAh from top manufacturers. Using counterfeit or low-quality cells can lead to catastrophic failure, fires, or explosions.
I used 117 18650 cells arranged in a 13S9P configuration. This way I created a battery pack with a voltage of 48V and a capacity of 32Ah. More voltage means more power, more amphours means more range. This is a very big and heavy battery pack, this is because I made it as big as I could and still make it fit in the scooter.
I used modular battery spacers to create the 13 x 9 grid for the battery pack. Spacers are used to prevent the cells from touching each other and short circuiting. Fishing tape is used on the outside of pack to allow me to route the balance wires to the connections, the tape prevents the wires from touching the cell sides and potential short circuiting after a while. I used a Kweld spot welder to spot weld the cells together with 0.2mm pure nickel strips.
I used a JKBMS battery management system to balance the cells and monitor the voltage and current. A battery management system is essential for lithium-ion batteries because they are very sensitive to overcharging, overdischarging and getting out of balance. The JKBMS is a very good battery management system that is widly used and has a lot of features, it connects with bluetooth to my phone and allows me to monitor the battery pack in real time. This BMS is very good because it also controls the input and output of the battery pack, as supposed to other bms's which only control the balancing of the cells. This BMS prevents overdischarging and overcharging of the battery pack.
The battery pack can be charged with a |insert amperage| 48V charger. This is very high and that is because this battery pack has so many cells in parallel, which allows for higher charge current. However, this would mean that you need a charger that can charge the battery pack with so much current. Those chargers are not very common and very expensive. So I use a lower amperage charger, this is also better for the battery pack, and safer.
Hub Motors and Controller
The scooter is powered by a dual hub motor system, providing great traction, hill-climbing, and off-roading. Each wheel has a built-in hub-motor, both connected to 1 central controller.
- 2x 10 inch, 48 volt, 3 phase 1500w hub motor
- 50A-18MOS controller, suitable for 48-60V scooters
- Motor power about 500W-1500W per wheel
- Independent motor control for better traction
- Regenerative braking capability
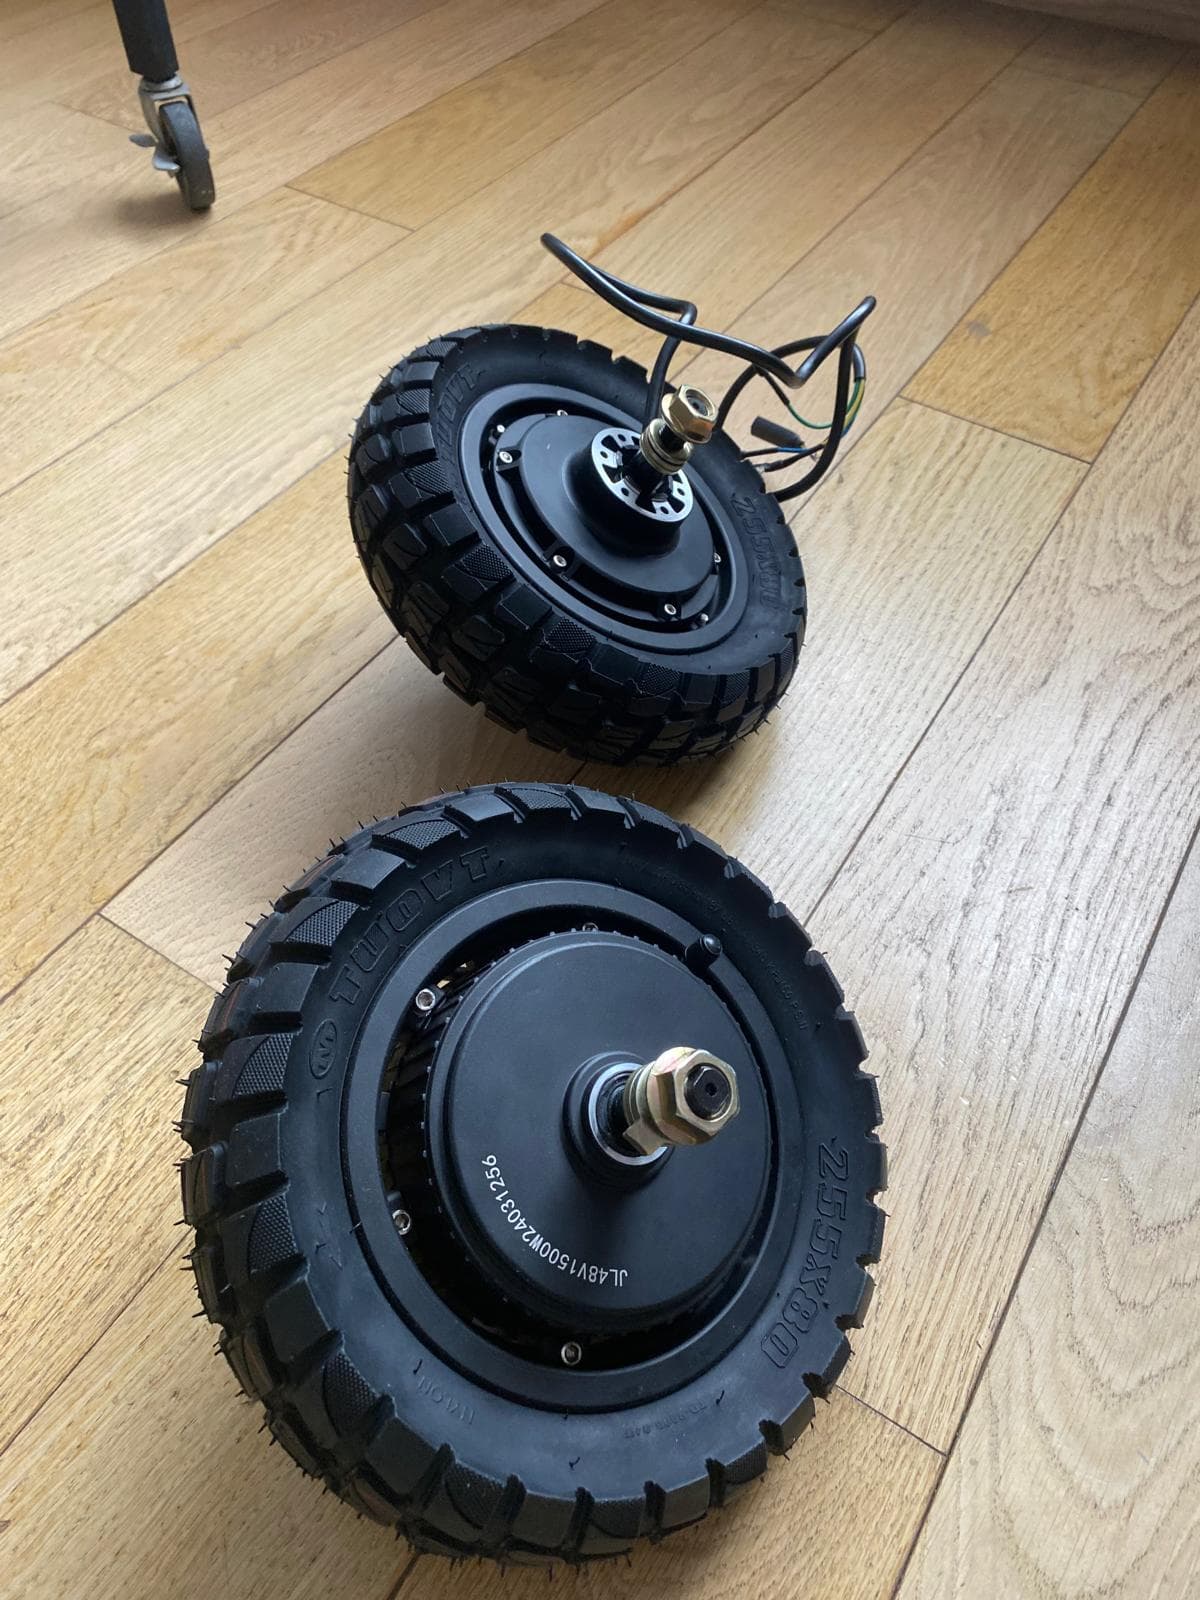
2 hub motors

Controller for the hub motors
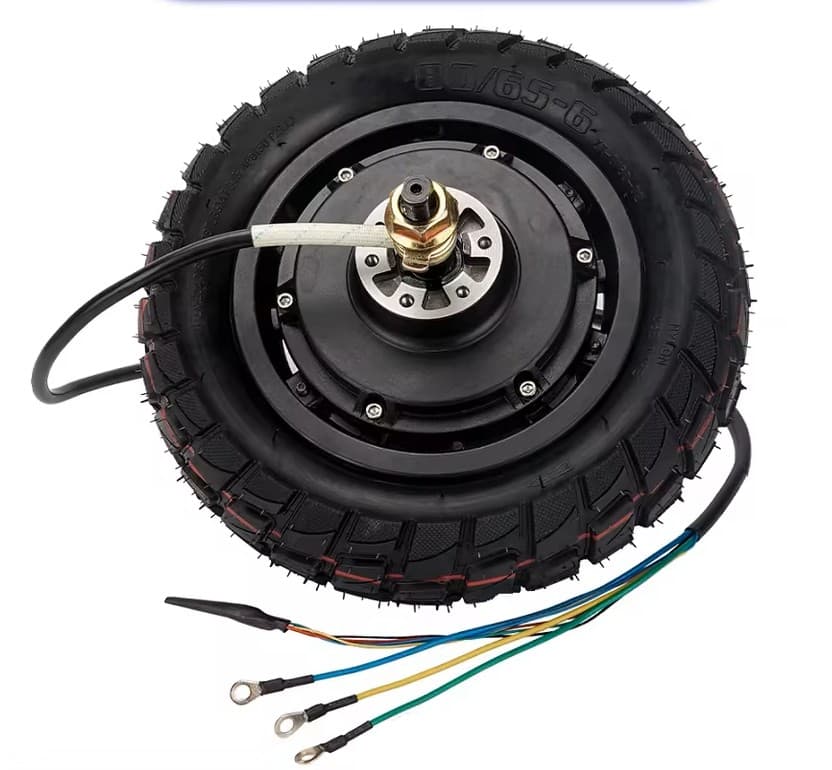
Hub motor
I decided to go with a dual hub motor system, this is because it makes the scooter much more powerfull and fun to drive. Each wheel has a built-in hub-motor, both connected to 1 central controller which controls both motors at the same time. The motor must be compatible with the voltage of the battery, that is why I went with a 48v motor. The motor is a 1500w motor, this is because I wanted to have a lot of power and torque. It is important to note that the battery must be able to supply the current needed for the motors.
Wattage (W) is voltage (V) times amperage (A), so 1500 W / 48 V = 31.25 A. This means I need a controller that can supply a total of 62.5 A to the 2 motors, however this controller is very big and expensive. So I went with a 50A controller, that is suitable for 2 48-60V motors. This however means that the scooter will not be able to reach the full potential of the motor (25A x 48V = 1200W), but it is still wayyy overpowered and fun to drive!
The controller is delivered with a Speedometer which you can also use to control all the controller settings. The speedometer, and all other switches like the lights, blinkers and horn are all connected to the controller. The motor controller is the brain of the scooter, it controls the motors, but also all the other components like the brakes, lights, blinkers and horn.
I decided to go with a 10 inch wheel, this is because it is a good size for a scooter. It is not too big and not too small. It is also a very common size and makes finding replacement tires easier. I decided to go with a pneumatic tires instead of a solid, tubeless, or Honeycomb tires. Pneumatic tires are a good choice for a scooter because they are very comfortable and easy to ride on rough terrain. They do have a higher puncture risk.
Suspension
The scooter features a robust suspension system designed for comfort and stability. Each corner has an independent spring suspension setup for optimal ride quality.
- 4x 750lb - 125mm springs
- 4 custom CNC'ed suspension arms
- Independent suspension on all corners
- Adjustable spring preload
- Custom-designed mounting points
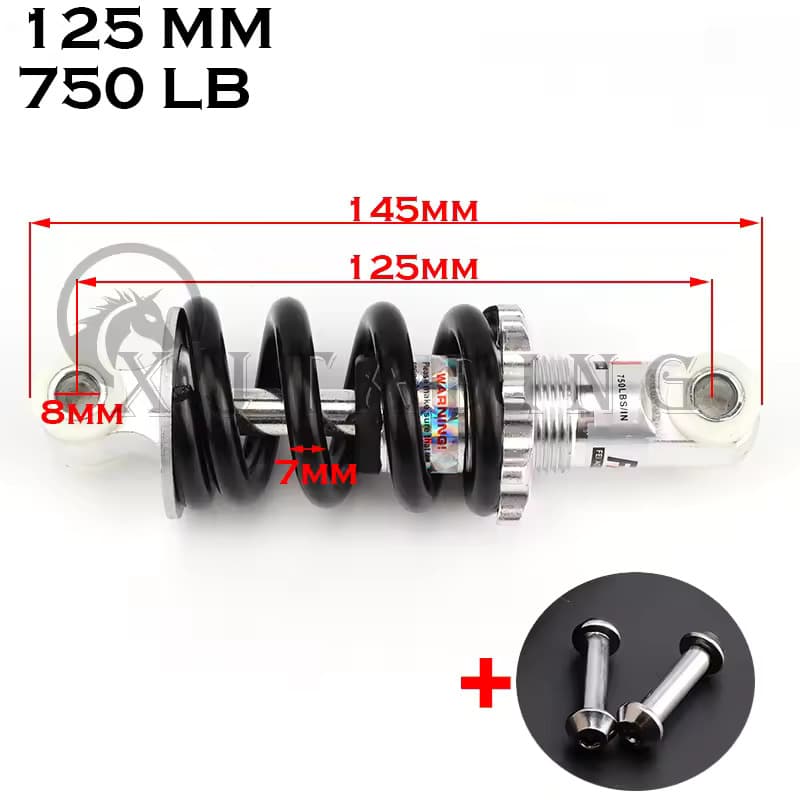
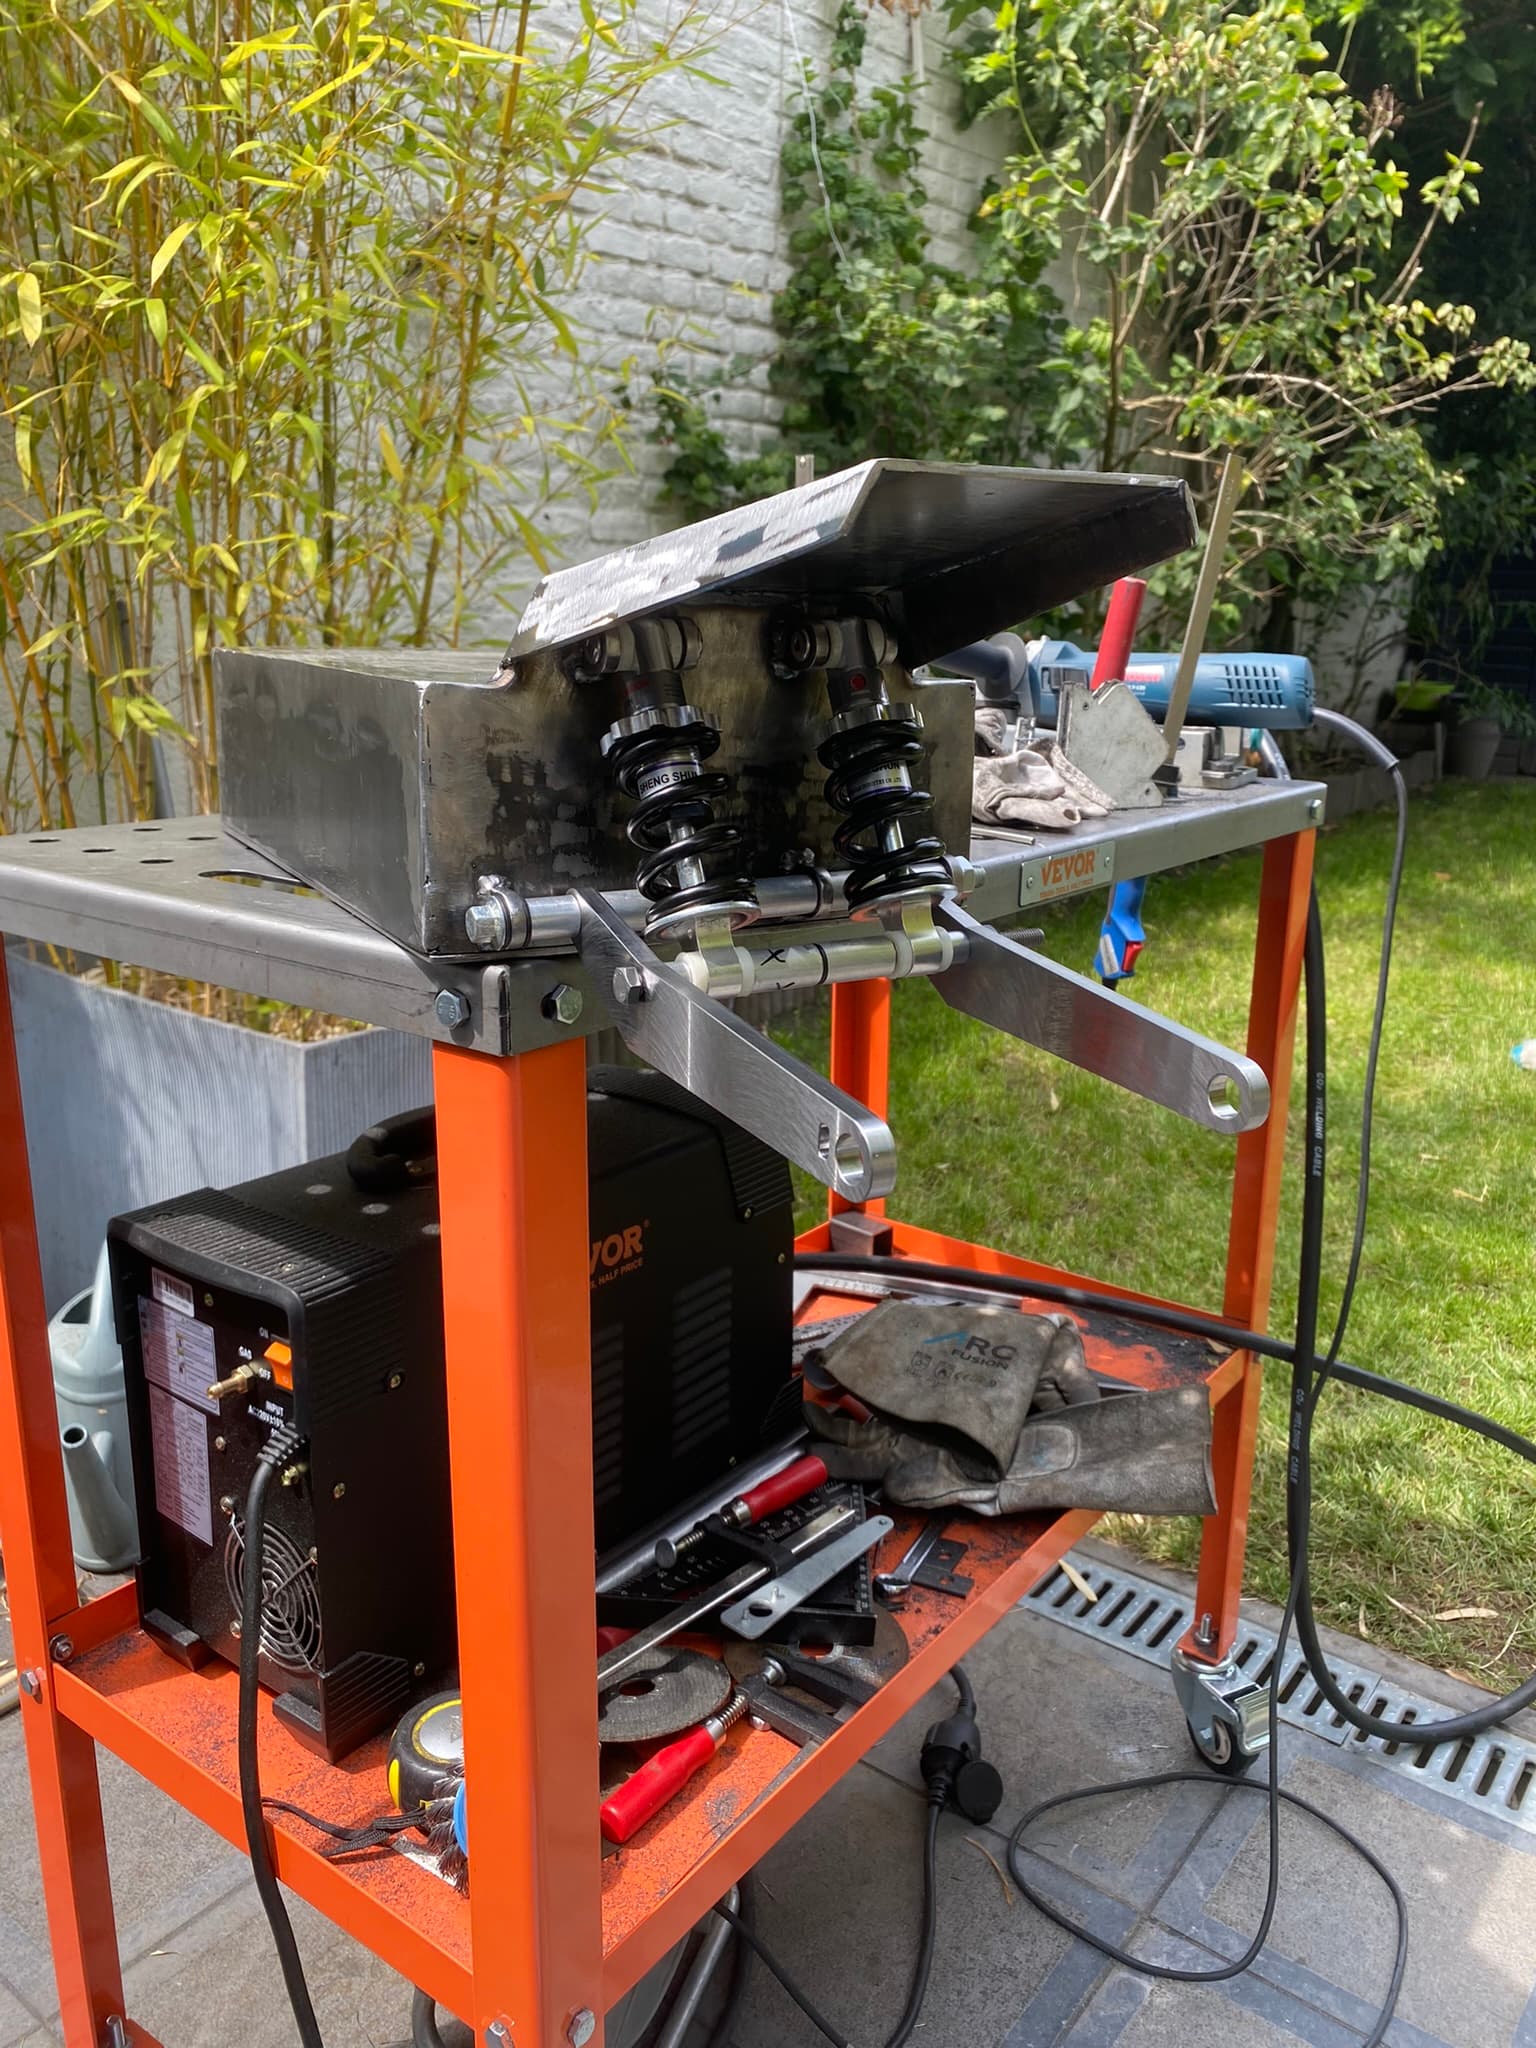
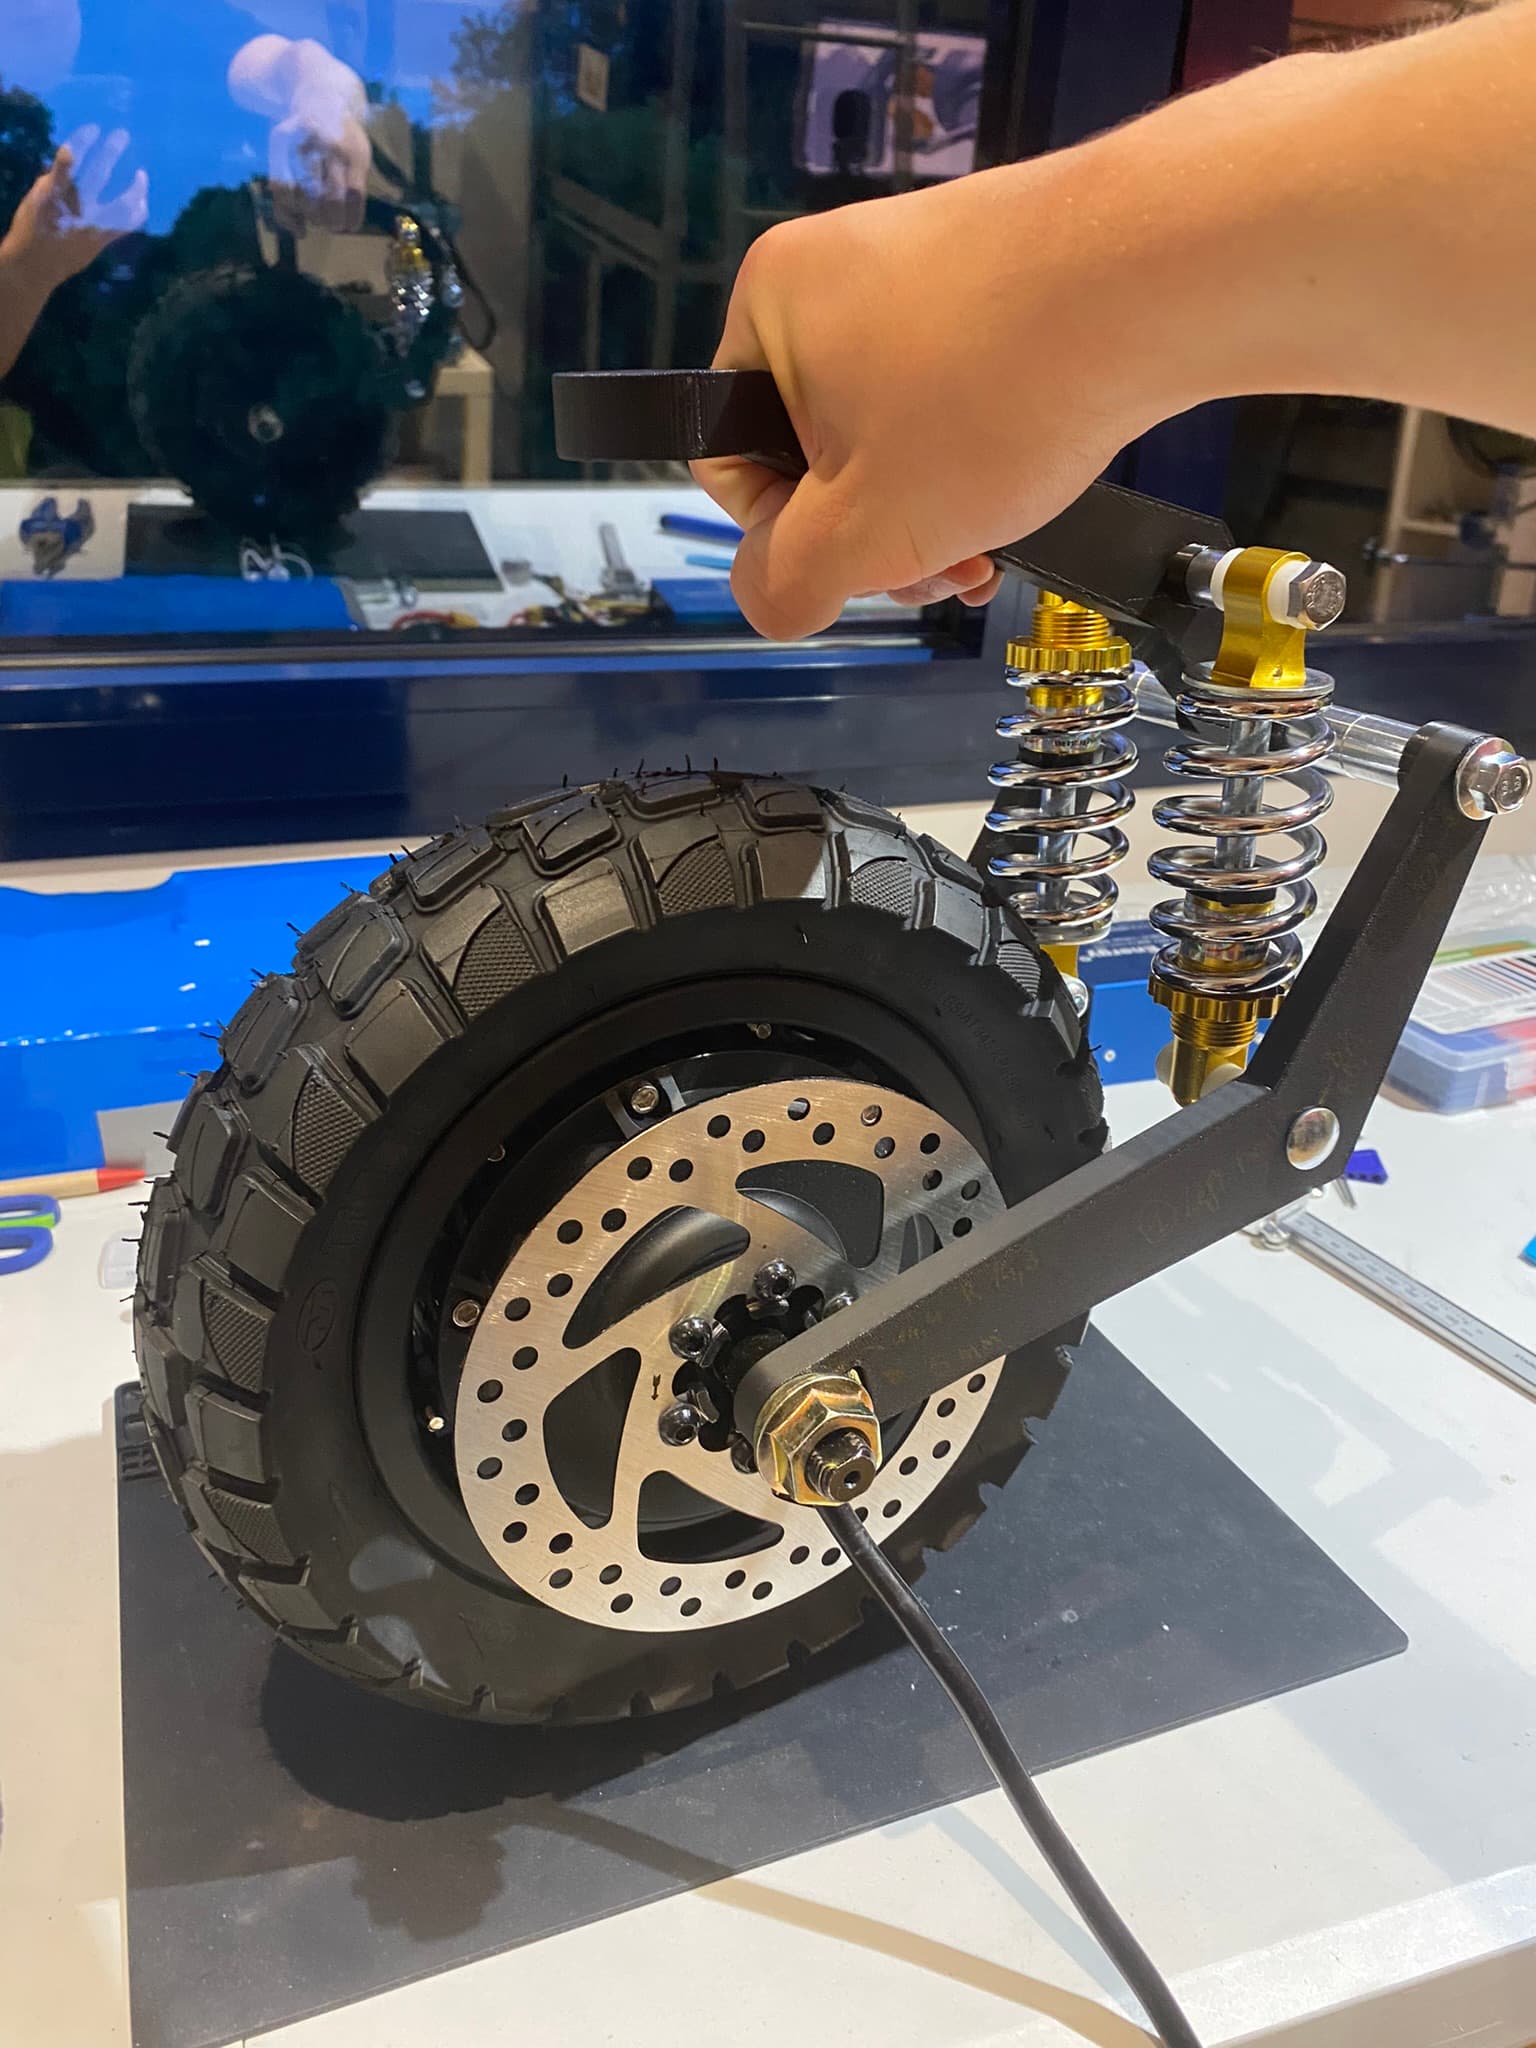
Rear suspension assembly

The suspension is a very important part of the scooter, it is responsible for the comfort and stability of the scooter. I decided to go with a 4x 750lb - 125mm spring suspension, this is because it turned out that those a good balance between comfort and stability. The springs are adjustable and can be tuned to the desired stiffness, but this is very hard to do. I initially went with 4x 500lb - 125mm springs, but they were too soft and made the wheel touch the spoiler when going over bumps.
The suspension arms are custom CNC'ed out of steel and designed to fit the scooter suspension geometry perfectly. More about this in the CNC section.
Steering Column
The steering column is a critical component that provides precise control and maneuverability. It was designed with safety and durability in mind.
- 35mm steel tube for main column
- 22mm steel tube for handlebars
- Custom CNC'ed steering arm
- Integrated cable management
- Quick-release height adjustment

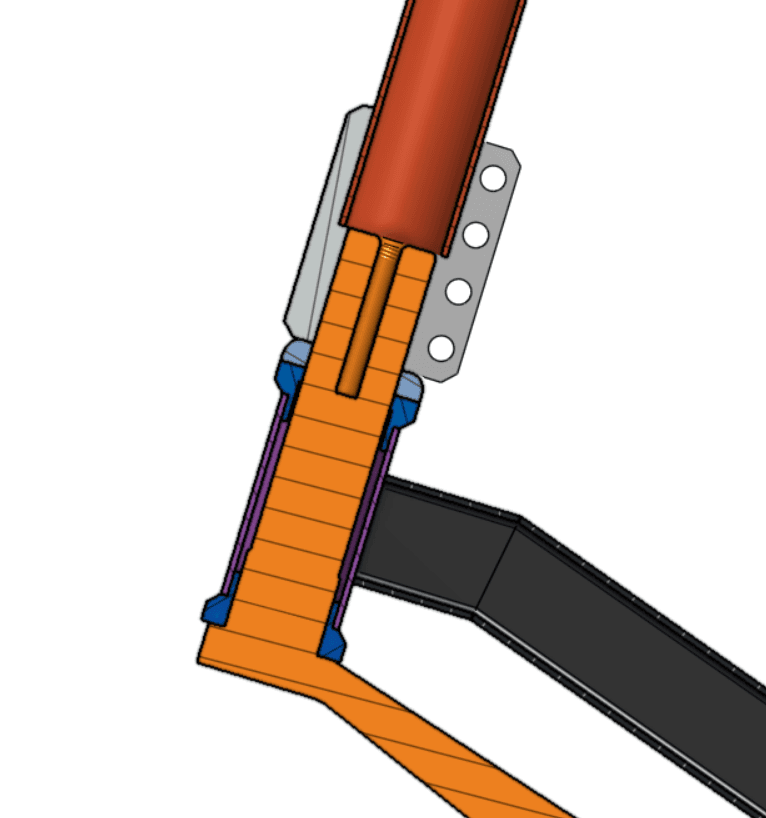
CAD steering assembly
The steering column assembly was the hardest, way harder than I expeced. It is a critical component that makes sure that you can steer the scooter. A lot of forces come here together, must be transfered, without rattling or shaking. While also making sure you can smoothly turn the wheel. You can see the complexity of the design in the design image.
The design uses bearings to allow for smooth rotation of the handlebars while also being able to transfer the weight of the scooter to the wheel. These bearings are inside of cups that are inserted into a tube. There are top and bottom rings to close the cup and keep the bearings in place. The most difficult part was making sure that all the dimensions and tolerances were perfect. This upper arms was also very difficult to manufacture, more on that in the CNC section.
As you can see there is also a clamp to clamp the main steering column to the upper arm. This allows for easy assembly and disassembly of the steering column.
The upper arm is custom CNC'ed out of steel and designed to fit the scooter steering geometry perfectly. I went with a 35mm steel tube for the main column and a 22mm steel tube for the handlebars.
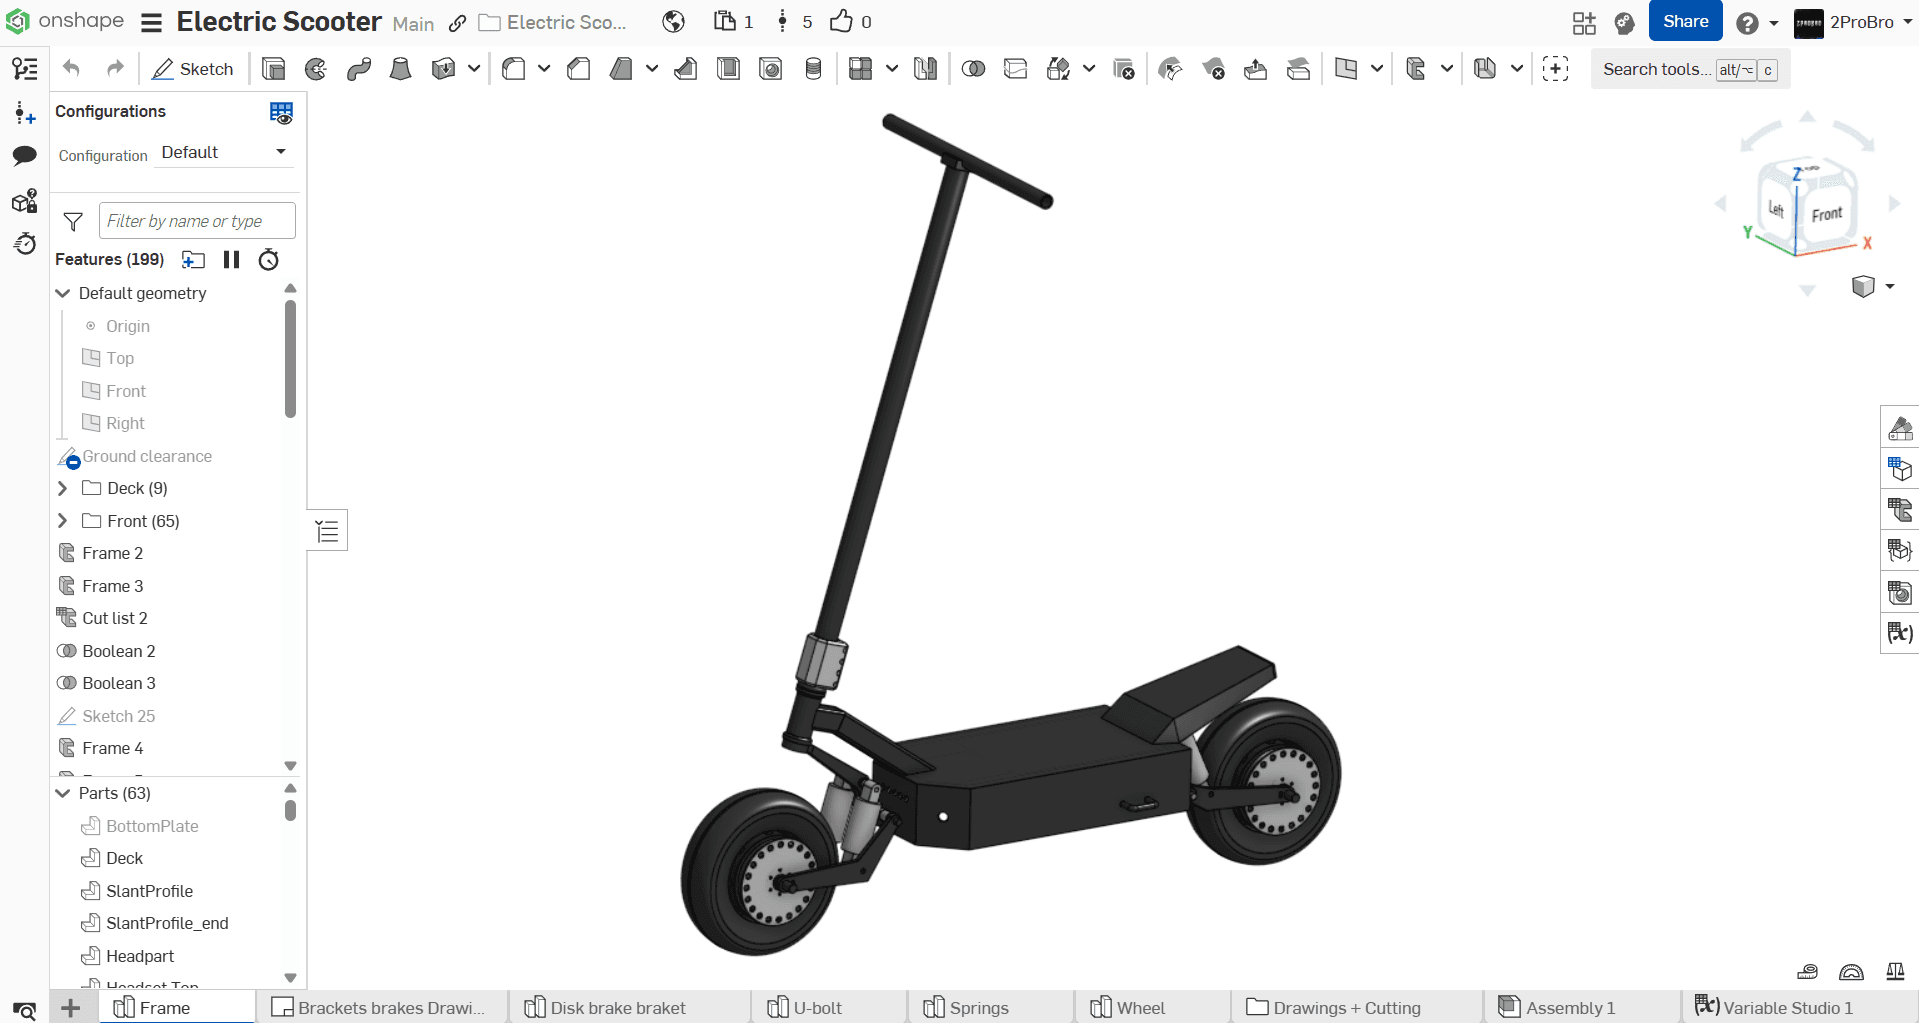
Design
Every component of the scooter was designed in CAD before manufacturing. This allowed for precise measurements and iterations to ensure everything would fit together perfectly.
- Everything was designed in Onshape
- Went through multiple design iterations
- Extensive 3D modeling of all components
- Stress analysis and optimization
- Assembly planning and fitment checks
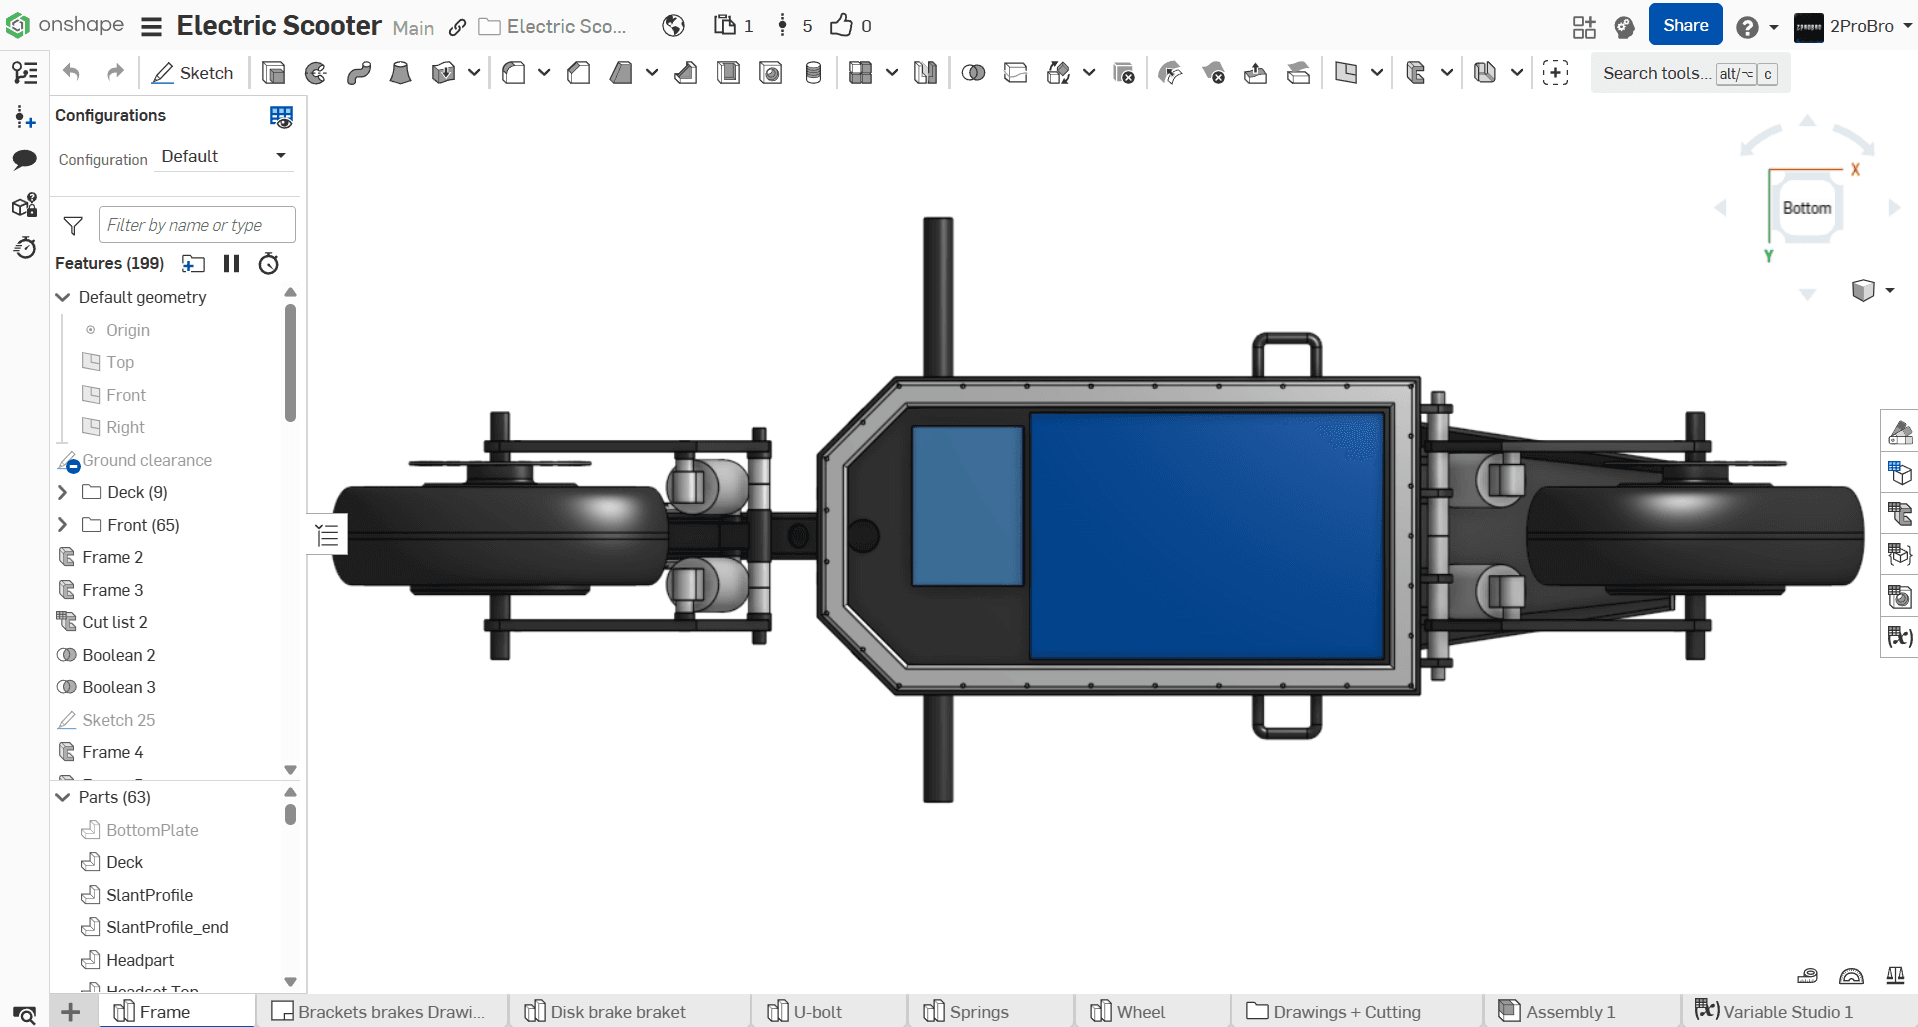
Scooter's bottom
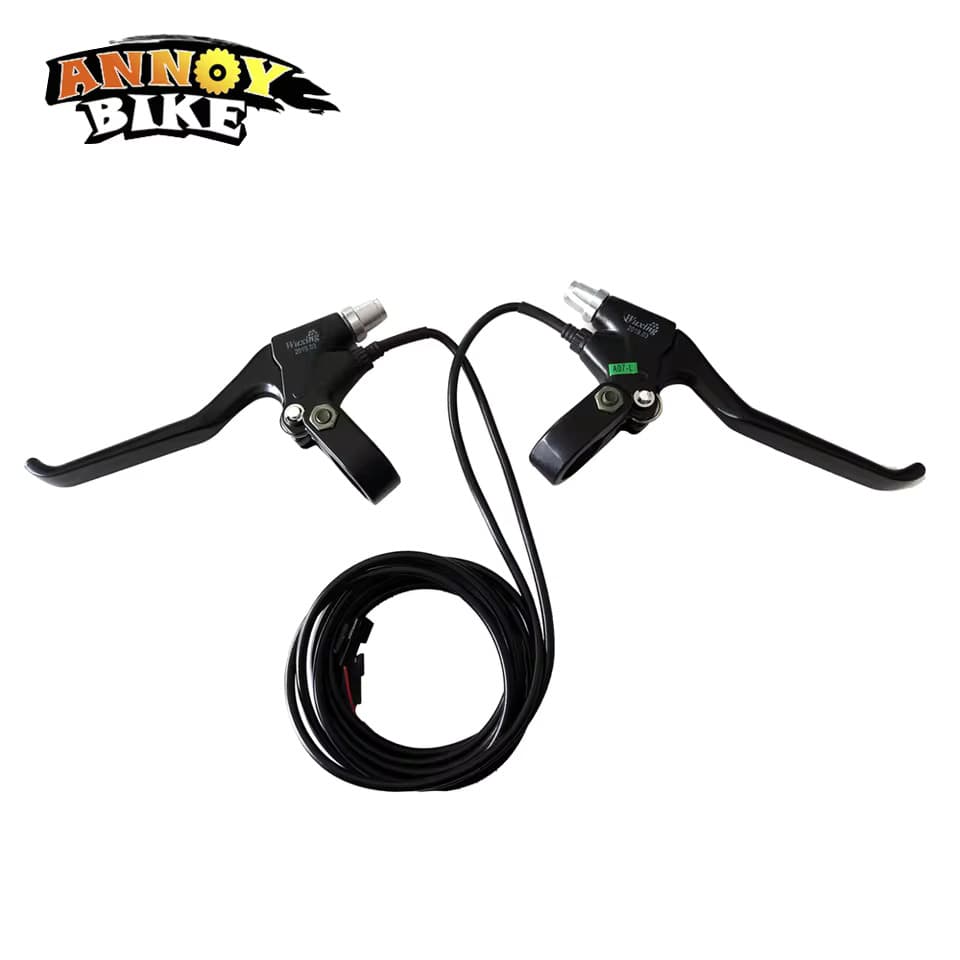
Electric brakes
I started of with a simple design, but as I was building the scooter I realized that I needed to make lots and lots of changes. I went through multiple iterations of the design, and in the end I ended up with the design you see here.
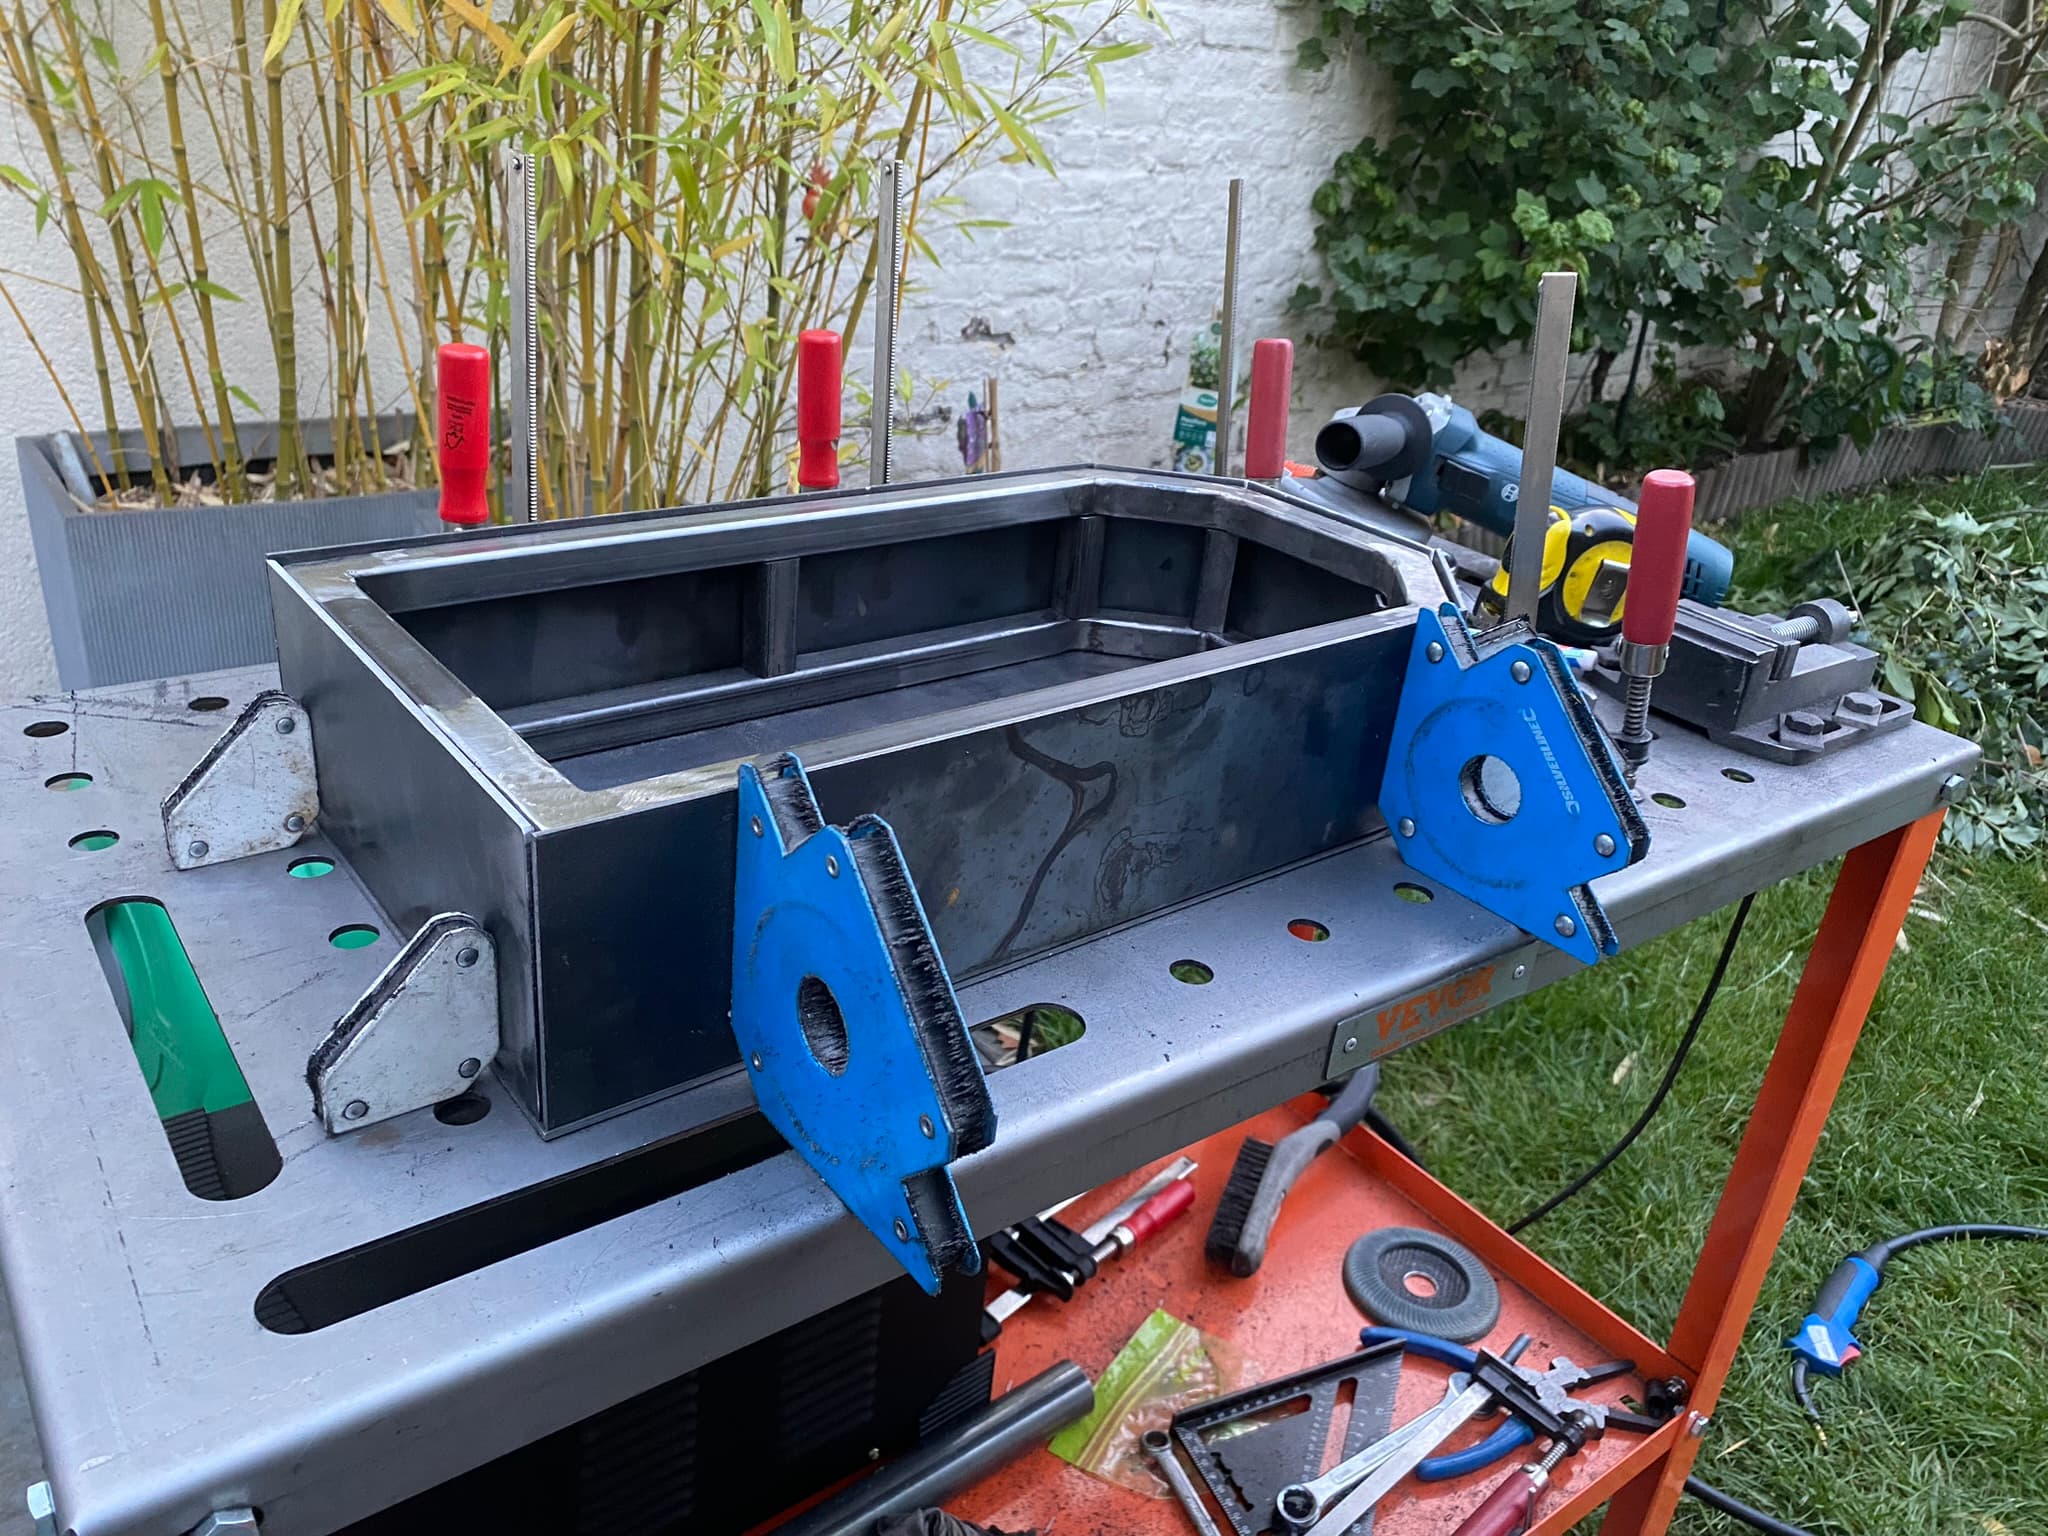
The main body consists of 3mm steel sheets, and the inner frame is made out of 20x20x2 mm square profiles. The front fork is made out of a 35mm square profile.
The steel panels are welded together to form the main body of the scooter. The inner frame is welded to the main body to form the inner structure of the scooter. The front fork is welded to the frame to support the front suspension, the back suspension is attached directly to the frame.
CNC Manufacturing
Several critical components of the scooter required precise CNC machining. I partnered with PCBway.com to manufacture these parts to exact specifications.
- 2x front suspension arms
- 2x back suspension arms
- 1x front steering upper arm
- Custom mounting brackets
- Precision-machined components
- High-strength aluminum construction

I outsources the manufacturing of the 4 suspension arms and the front steering upper arm to PCBway.com. They were able to manufacture the parts to exact specifications and tolerances in my design. It was however not as easy to create the design. I had never designed anything for CNC manufacturing before and my first designs were not manufacturable. The suspension arms were relatively easy to design, and simulate in FreeCAD FEA (Finite Element Analysis) to make sure they were strong enough.
The front steering upper arm was the most difficult part to design, because it had to be able to support the weight of the scooter and the steering column. It had flat surfaces, multiple holes, a tapped hole, and round surfaces. That's why I talked to multiple manufacturers to ask them how I could make the design manufacturable.
I ended up splitting the upper arms into 2 parts. Which would first be threaded and then welded together, to ensure a very strong connection because this connection needs to be able to handle the handle the entire weight of the scooter. A failure of this connection would mean that I would lose control of the scooter and crash, potentially with serious consequences.
Manufacturing
The frame and body of the scooter were welded by me. I used a cheap welding machine.
- VEVOR MIG/MMA/LIFT TIG 3-in-1 welding machine
- Flux core wire
- 3mm steel sheets (main body)
- 20x20x2 mm square profiles (inner frame)
- 35mm square profile (Front fork)
- 22mm steel tube (handle bars)
- 35mm tube (steering column)
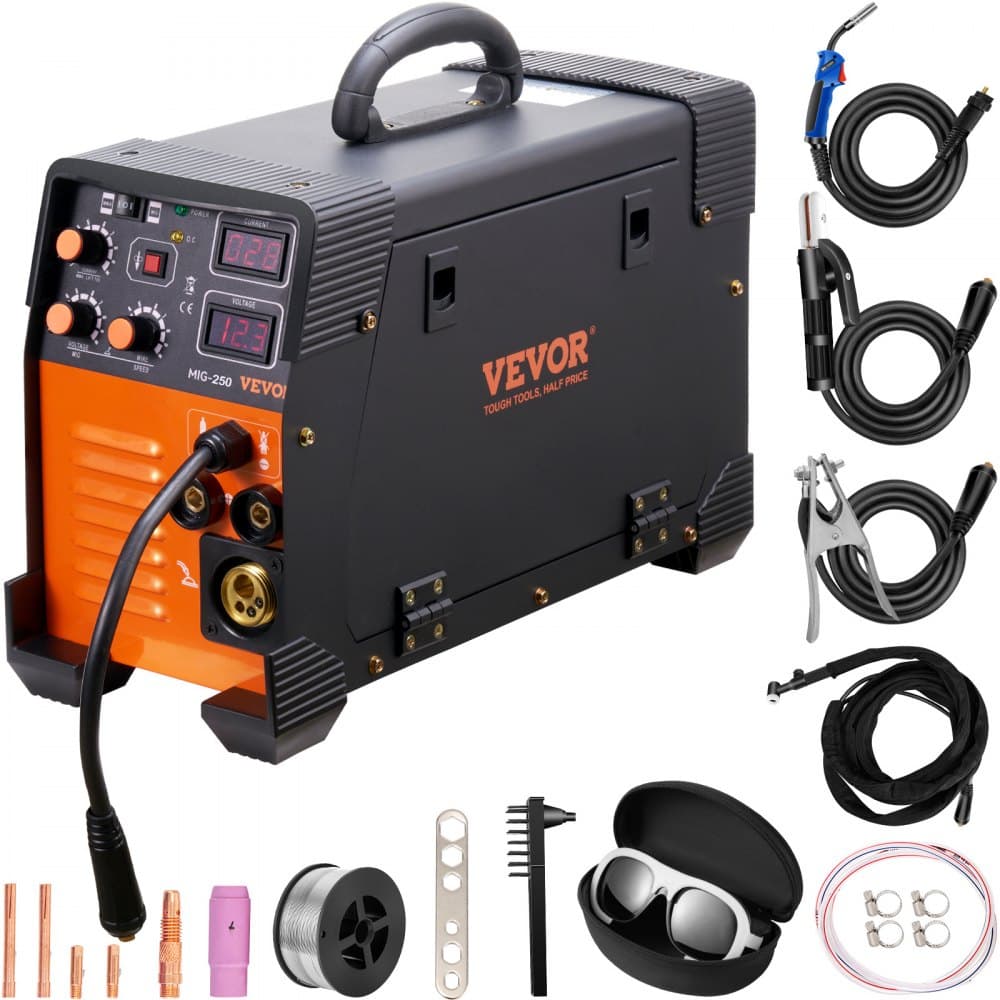
VEVOR welding machine
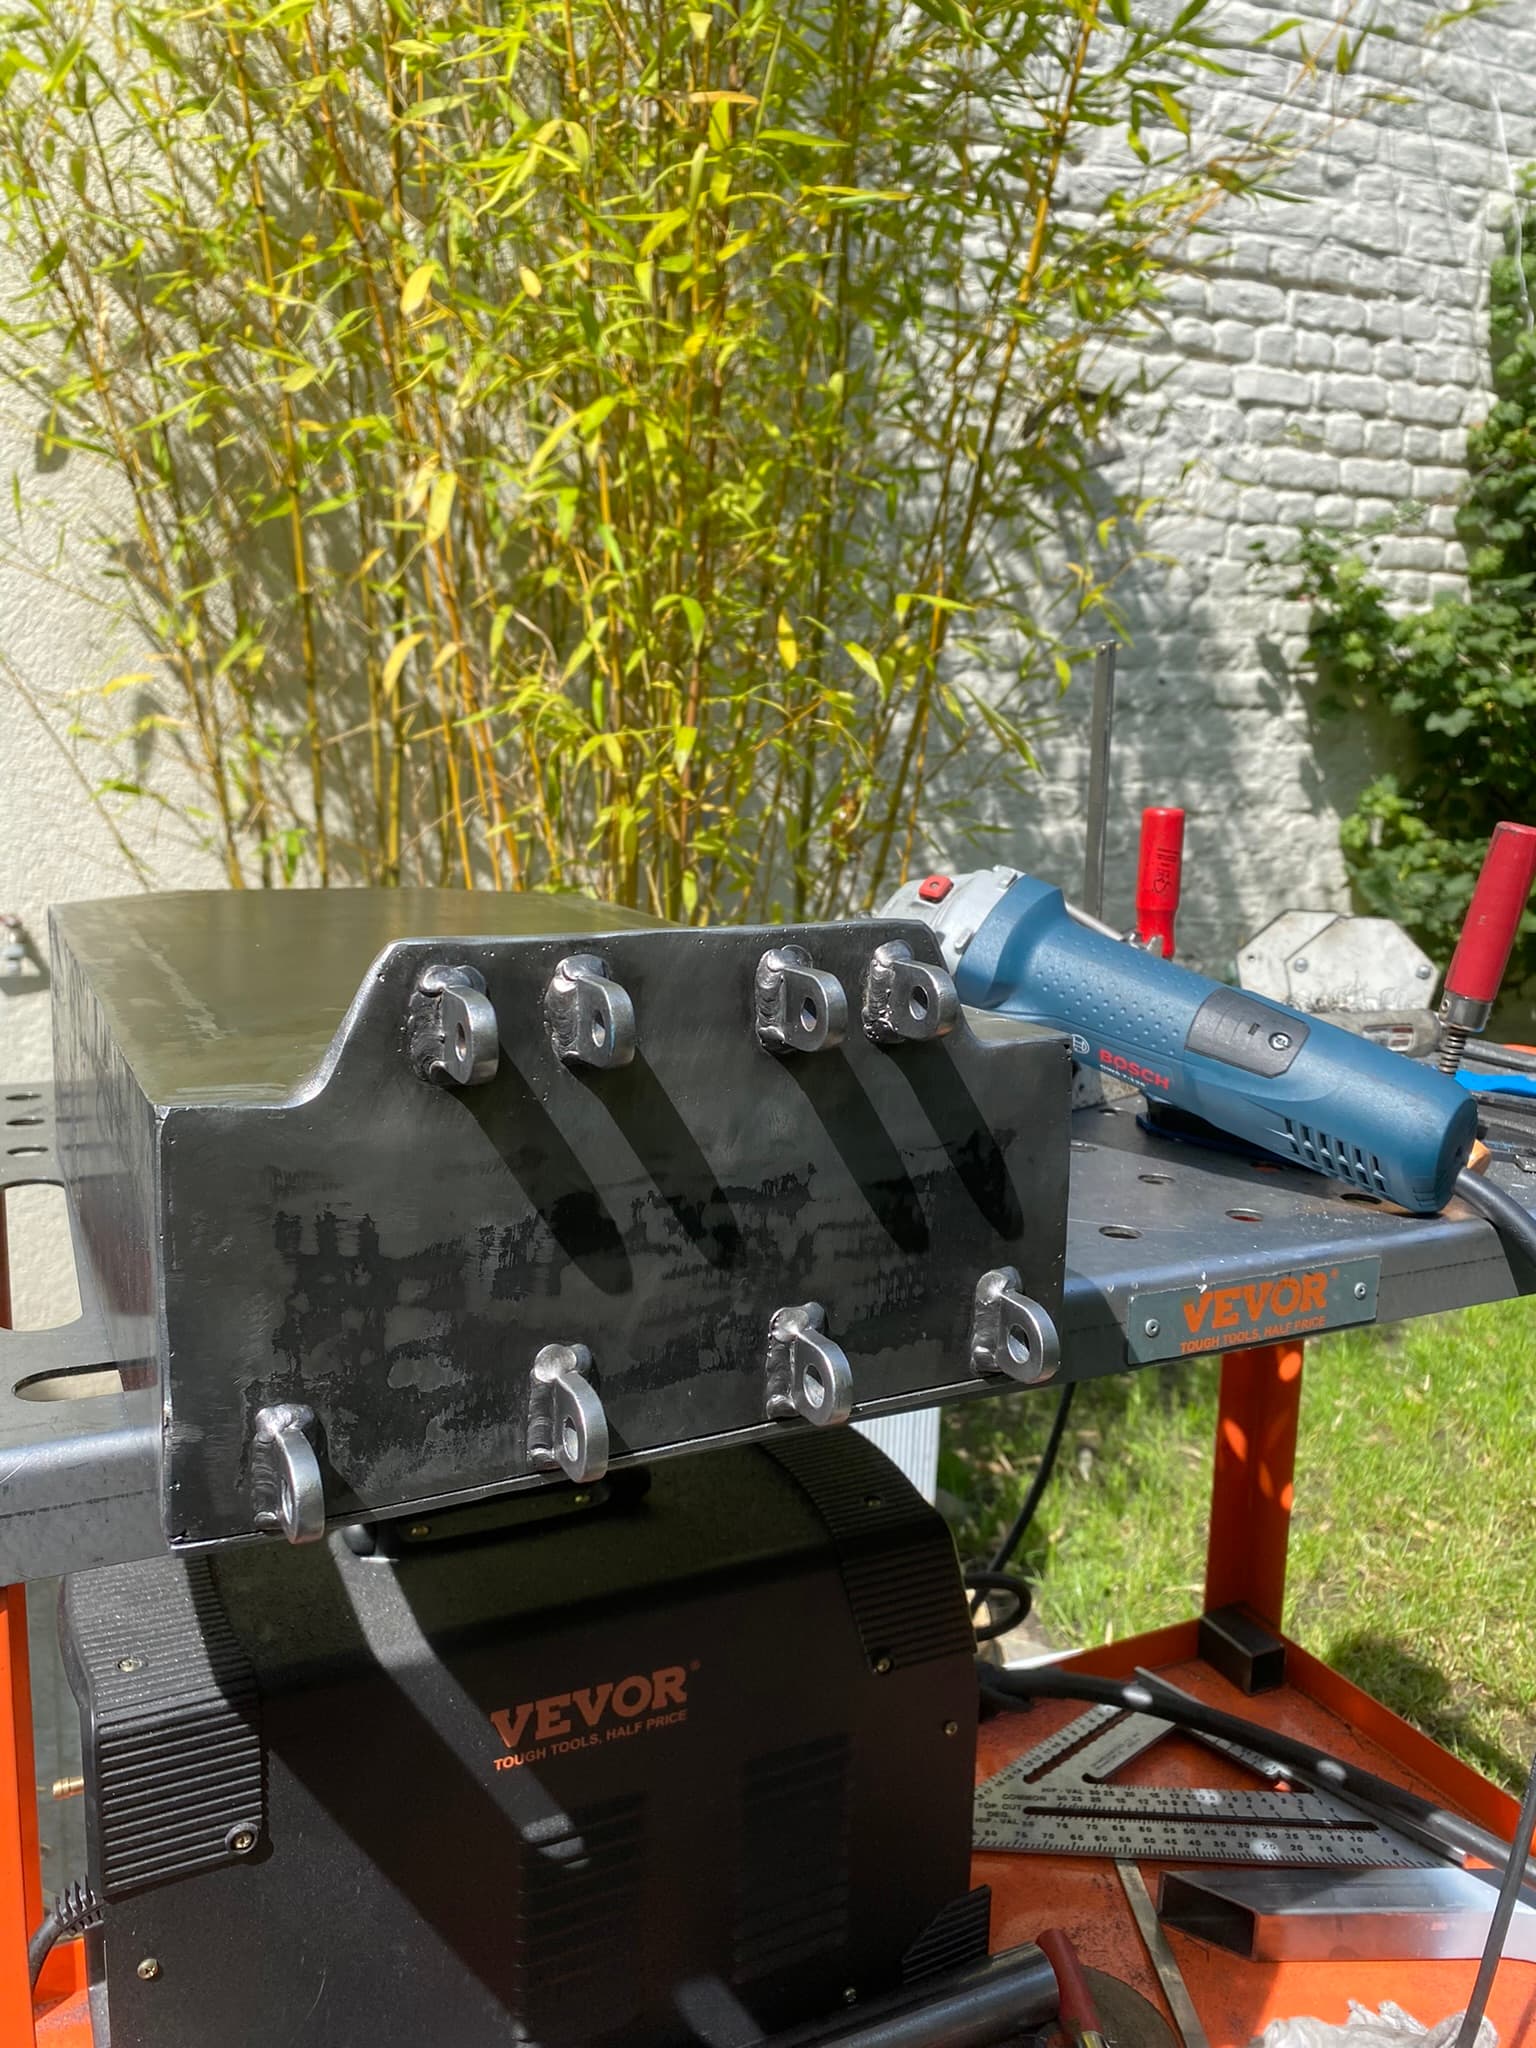
Backside brackets
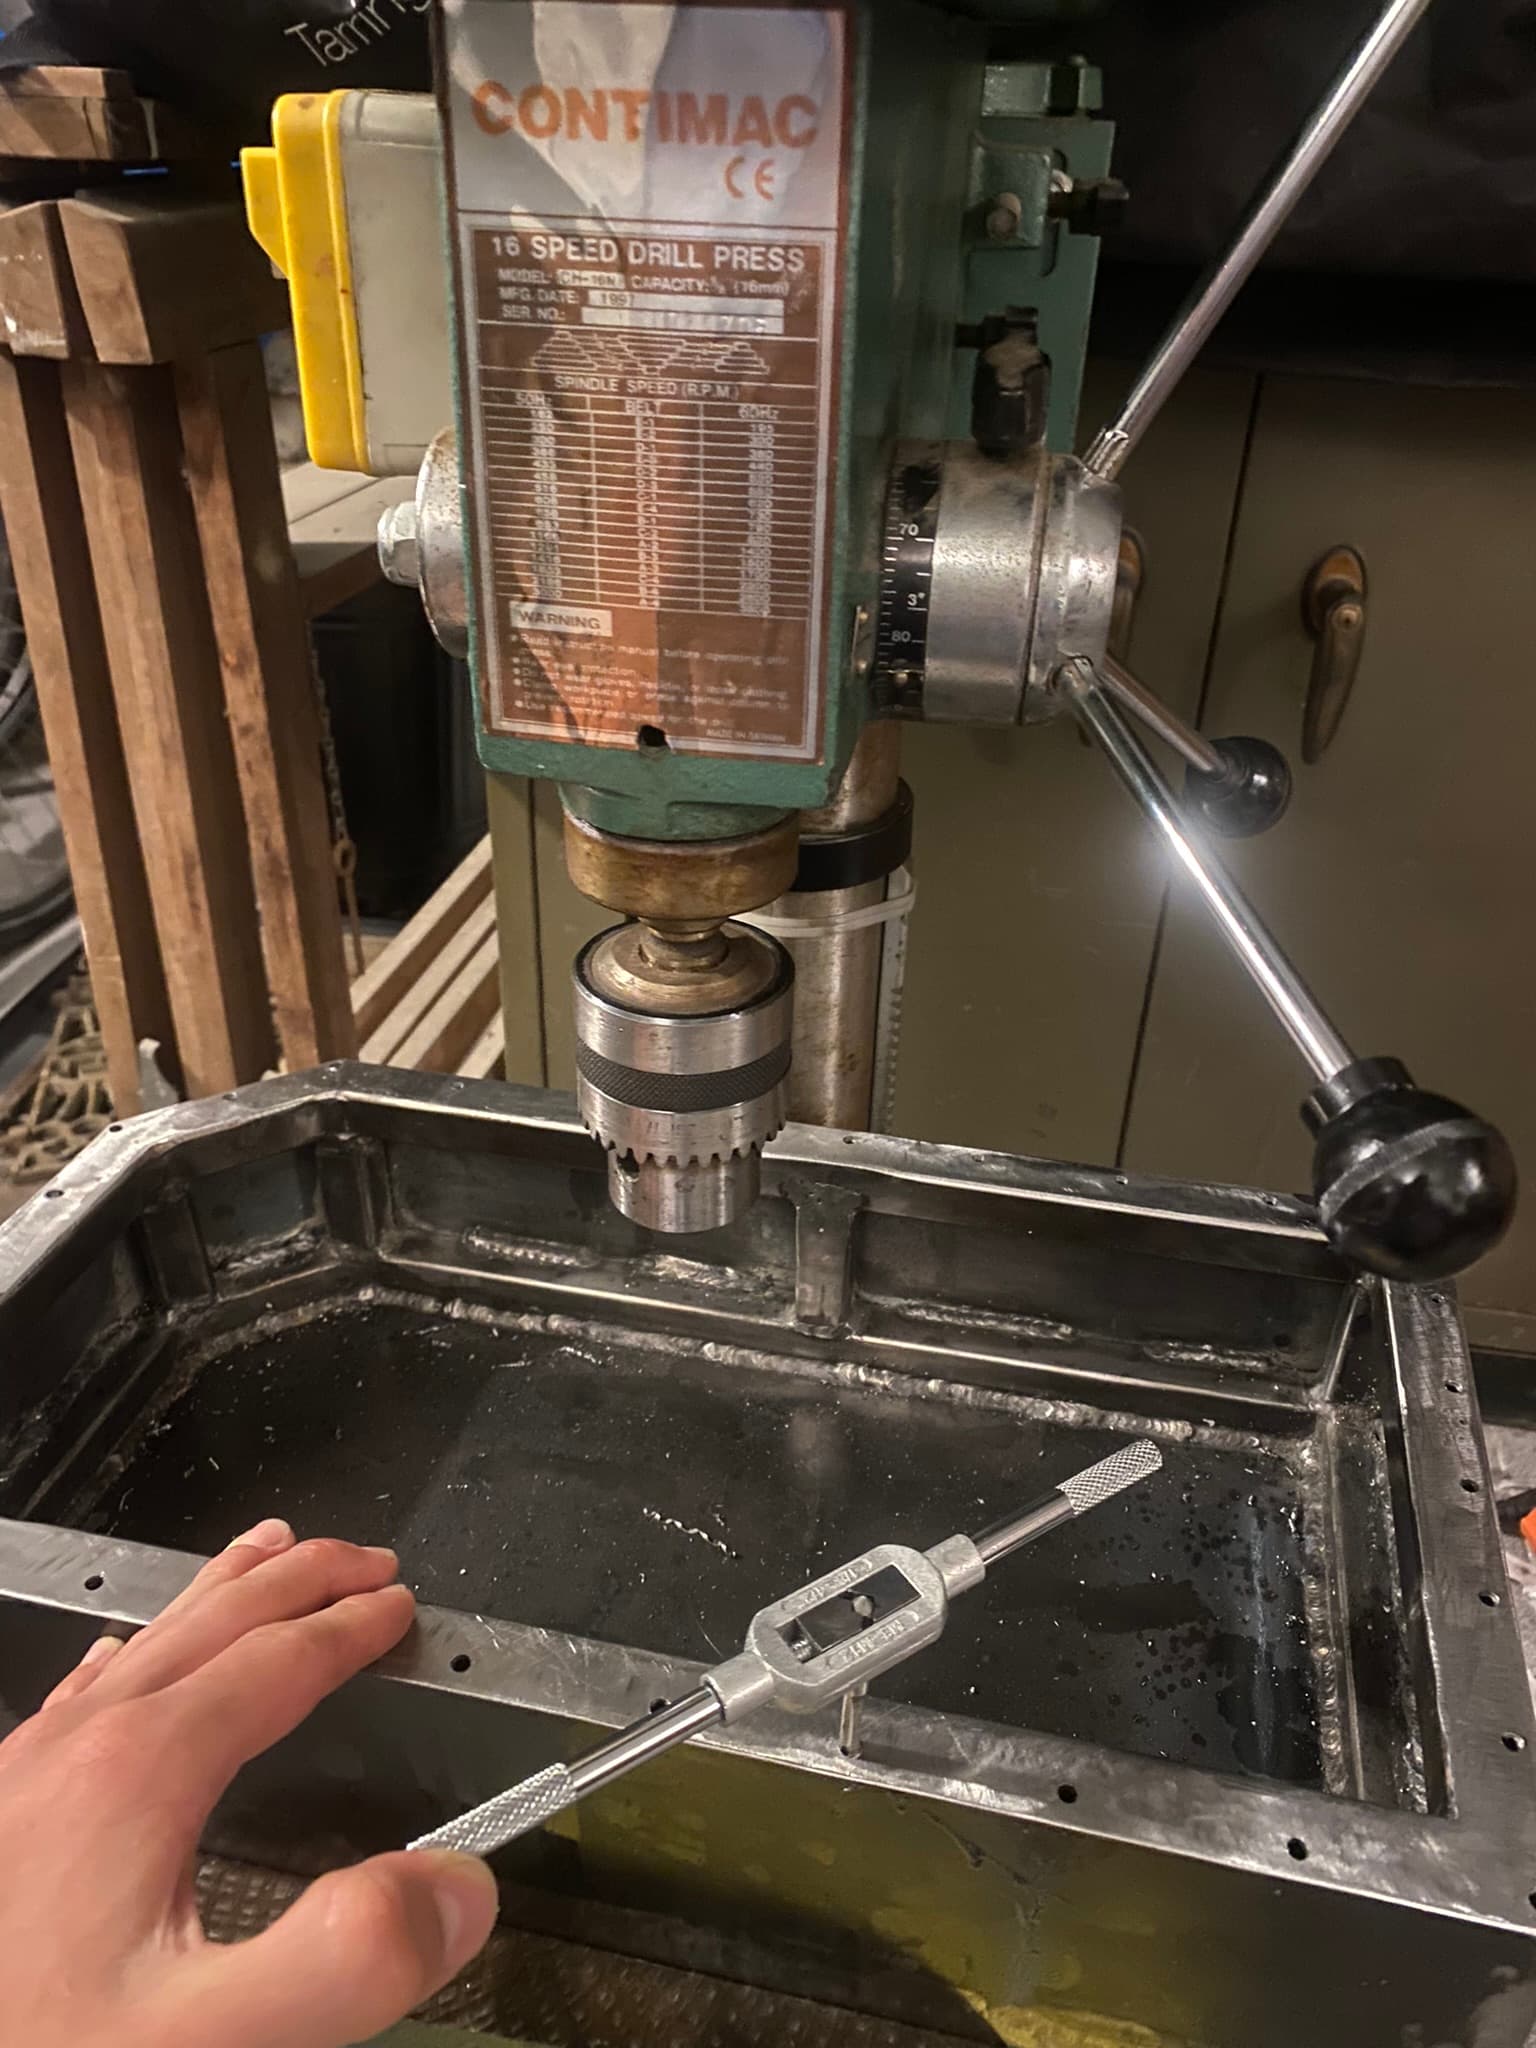
Tapping holes
As mentioned before, I welded the frame and body of the scooter myself. I used a VEVOR MIG/MMA/LIFT TIG 3-in-1 welding machine. This machine is a cheap welding machine that can be used for flux core welding. Flux core welding means I dont have to buy a separate gas tank, I just use the flux core wire which has flux inside of it to protect the weld.
The whole scooter is built out of steel. It is heavier than if I would have used aluminum, but steel is a lot cheaper and easier to weld. I used 3mm steel sheets for the main body and 20x20x2 mm square profiles for the inner frame. The front fork is made out of a 35mm square profile.
The handlebars are made out of a 22mm steel tube, this is a standard size for handlebars so it makes it easy to find compatible parts, like the throttle, or other handlebar accessories. Finding a 22mm steel tube was not easy, I had to search for a while to find one. The 22 tube is welded to the steering column, which has a diameter of 35mm, so it fits perfectly inside the scooter clamp.
The front fork (the upper arm assembly) is welded to the frame, however the back suspension brackets are directly welded to the frame.
The spoiler is welded to the back of the scooter, it is made out of a 3mm steel sheet. I was first going to use a 3d printed spoiler, but I decided to go to steel so it would be strong enough to support my weight so I can stand on it. That makes the desk area bigger.
The scooter is painted with a layer of spray paint, to protect the steel from the environment, otherwise it would rust.
Electronics
The electrical system ties everything together, from the power delivery to controls and safety features. The system is built around a central 48V controller that manages all inputs and outputs.
- 48V central controller
- Speedometer + control unit
- Lights and turn signals
- Brake sensors with motor cutoff
- Key switch with voltage meter
- Airtag location tracking
- Regenerative braking capability
- 3-pin charging port
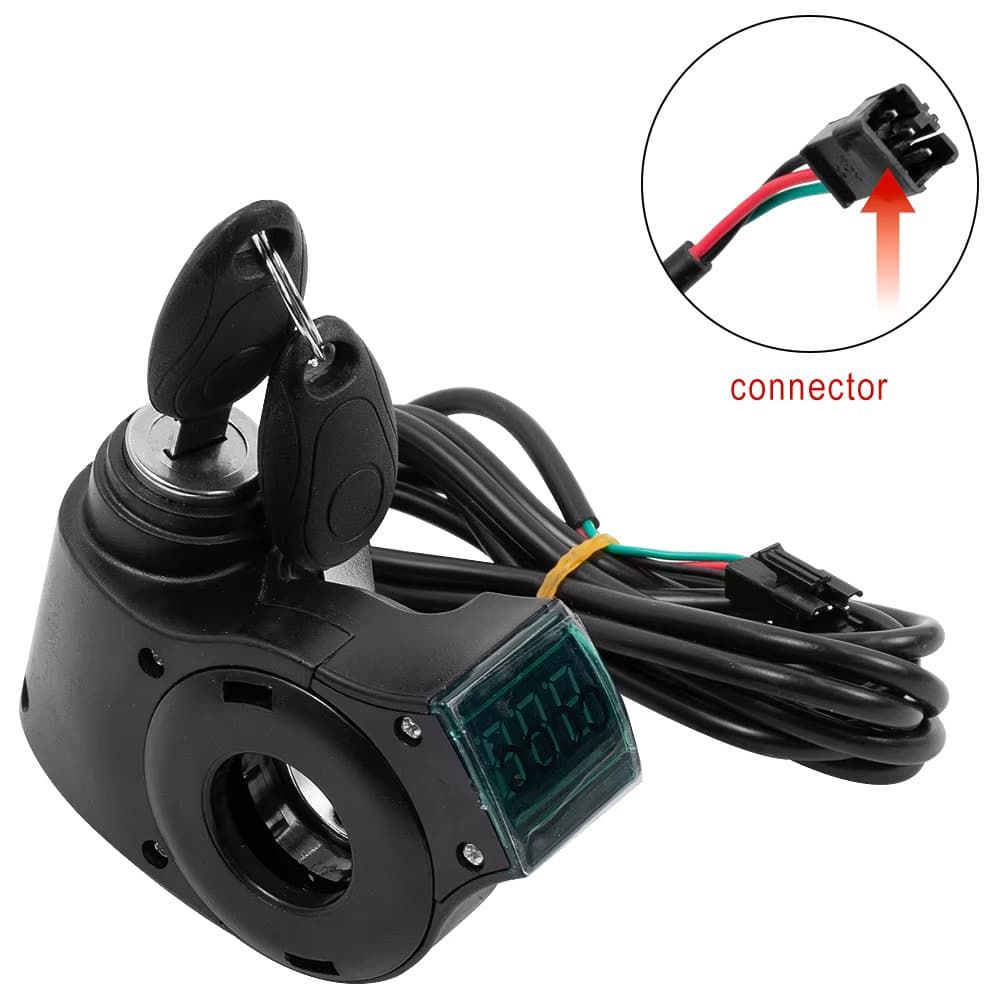
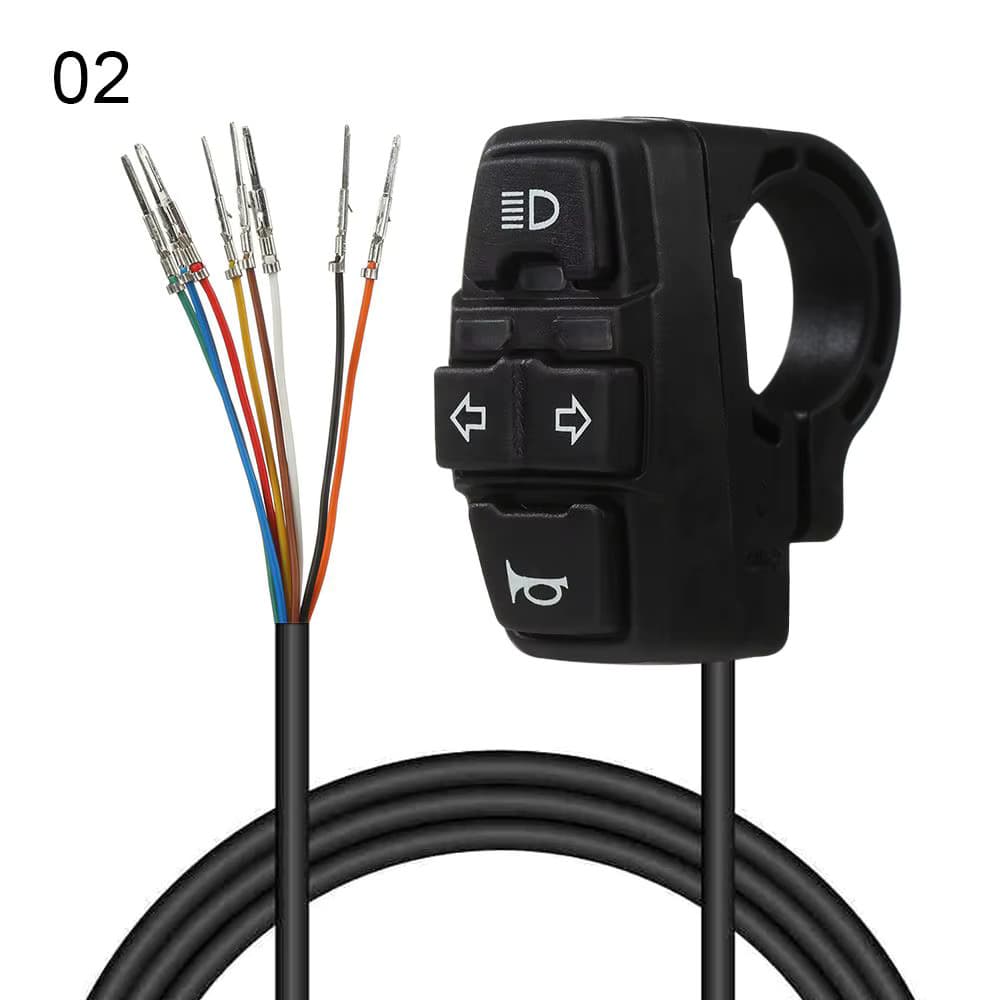
Lighting controls and switches
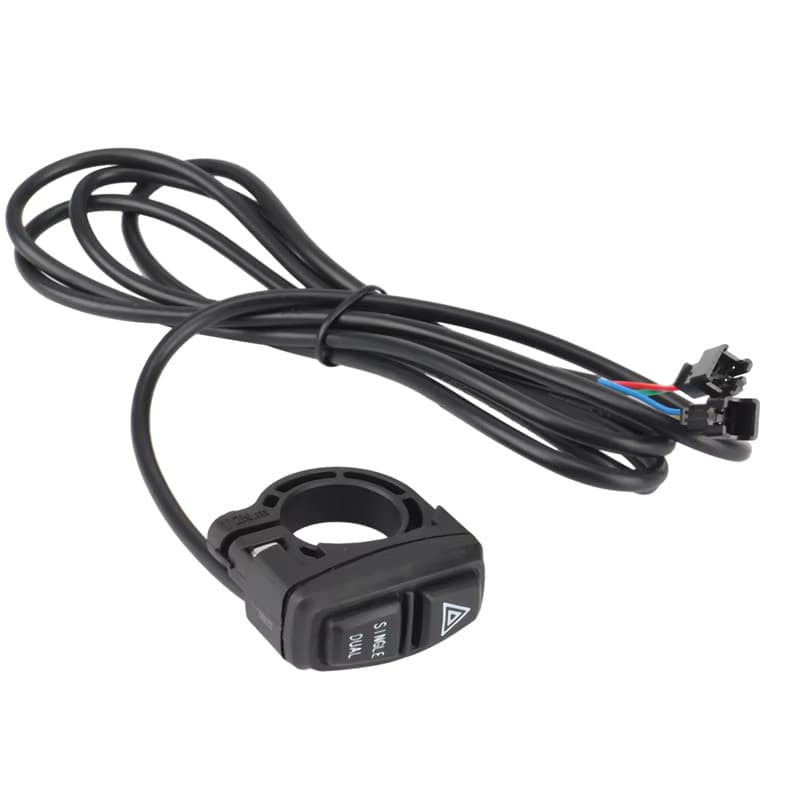
Hazard warning light switch
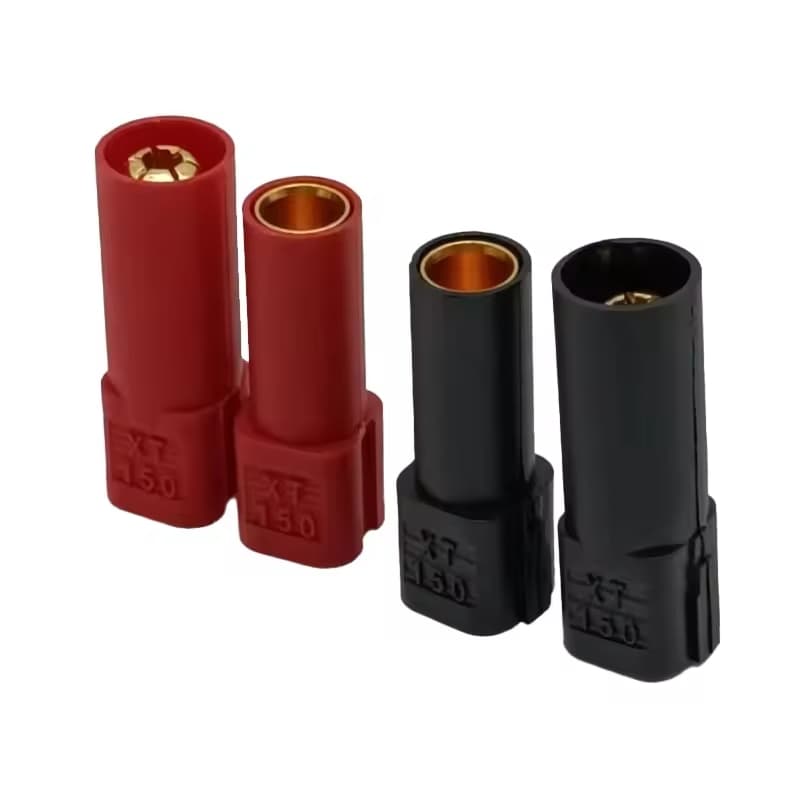
Battery connectors
The electrical system is centered around a 48V controller that acts as the brain of the scooter. This controller manages all inputs and outputs, coordinating the various electronic components. It receives input signals from components like the throttle, brake sensors, and control switches, and sends output signals to the motors, lights, and other systems.
For safety and control, brake sensors are integrated into the brake handles. These sensors send signals to the controller to immediately cut power to the motors when the brakes are applied, ensuring that braking always takes priority over throttle input. Additionally, the controller supports regenerative braking, which converts kinetic energy back into electrical energy during braking. This not only helps slow down the scooter but also increases efficiency by recharging the battery.
The scooter features a key-based security system combined with a voltage meter display. While the BMS already provides detailed battery information via Bluetooth to my phone, having an analog voltage meter allows for quick battery level checks without needing to connect to the app. For location tracking, I installed an Apple Airtag. While I considered adding a dedicated GPS tracker for real-time location monitoring, the Airtag proved to be a more cost-effective solution that provides sufficient tracking capabilities for my needs.
For the charging system, I used a standard 3-pin 2-wire charging port connector, which is commonly used in electric scooters. It makes it easy to find compatible chargers. It has some protection from the environment, to prevent water and dirt from entering.
Bill of Materials
Main Components
| Item | Price (€) |
|---|---|
| Battery Cells | 200.00 |
| BMS | 47.00 |
| Big Heat Shrink | 19.00 |
| Battery Spacers | 11.00 |
| Fish Paper (Insulation) | 5.00 |
| Nickel Strips | 24.00 |
| Scooter hub motors (2x) | 216.00 |
| Motor Controller | 140.00 |
| Electronics (buttons, keys) | 18.00 |
| Disk brakes 140mm (2x) | 7.50 |
| Brake calipers (2x) | 12.00 |
| Brake handles | 6.00 |
| Brake wire | 10.00 |
| Handbar grips (22mm) | 3.00 |
| Rear light + Reflectors | 8.00 |
| Paint | 6.00 |
| Shock absorbing foam | 8.00 |
| EPDM gasket | 5.00 |
| Watertight wire plugs | 5.00 |
| Cable management | 6.00 |
| Grip tape | 3.00 |
| Airtag | 30.00 |
| Foot stand | 4.00 |
| Front spoiler | 35.00 |
| Suspension spring (4x) | 25.50 |
| Scooter Clamp scs | 35.00 |
| Total | 889.00 |
Extra Equipment
| Item | Price (€) |
|---|---|
| Spot welder Kweld | 95.00 |
| Lipo battery | 40.00 |
| Lipo Charger | 30.00 |
| Charge Bag | 17.00 |
| Connectors etc | 20.00 |
| Wall charger | 35.00 |
| Rain cover for scooter | 4.00 |
| 2 spare inner tires | 8.00 |
| Phone holder | 3.00 |
| Total | 252.00 |
Welding Equipment
| Item | Price (€) |
|---|---|
| Vevor welder | 200.00 |
| Flux core wire | 20.00 |
| Extension Cord | 54.00 |
| Welding table | 108.00 |
| Welding blanket | 16.00 |
| Helmet + Gloves | 60.00 |
| Clamps + Magnets | 20.00 |
| Welding pliers | 12.00 |
| Flux core attachement | 5.00 |
| Welding jacket | 40.00 |
| Total | 535.00 |
Optional Equipment
| Item | Price (€) |
|---|---|
| Portable Electric Air Compressor | 40.00 |
| GPS Tracker | 40.00 |
| Welding Gas bottle | 120.00 |
| Respirator | 40.00 |
| Total | 240.00 |
Frame Materials
| Item | Price (€) |
|---|---|
| Bottom + top plate | 30.00 |
| Side plates | 11.00 |
| Small angle plates | 3.00 |
| Front plate | 3.50 |
| Back plate | 3.50 |
| Rear spoiler | 10.00 |
| 20mm frame | 9.50 |
| Slant profile | 5.00 |
| Handle bar (22mm) | 2.00 |
| Steering long pipe (35mm, 2 mm) | 8.00 |
| Steering short pipe (38mm, 2mm) | 4.00 |
| Steel Plate (6mm) | 10.00 |
| Headset | 15.00 |
| 28.6mm spacers | 2.00 |
| M10 spacers | 12.00 |
| M8 spacers | 3.50 |
| Bolt M8 180 mm | 6.50 |
| Bolt M8 170 mm | 6.00 |
| Bolt M8 120 mm | 4.50 |
| Bolt M10 220 mm | 4.00 |
| Bolt M10 170 mm | 4.00 |
| 8mm (M6) small bolts | 7.00 |
| Watertight nuts | 28.00 |
| CNC parts (PCBWay) | 560.00 |
| Delivery cost | 15.00 |
| Total | 767.00 |
Summary
Resources
Motors
Batteries
Steering
Bearings
Manufacturing
Documents and 3D Files
Coming soon... I will share all the CAD files, technical drawings, and documentation.
Step by Step Guide
Coming soon...